If you’ve ever wondered how to capture that perfect, pillowy-soft, melt-in-your-mouth marshmallow magic right at home, you’re in for a treat with this Homemade Marshmallows Recipe. It’s an utterly delightful project that transforms just a handful of simple ingredients into fluffy clouds of sweetness, far surpassing anything store-bought. Whether you want to elevate your hot chocolate, create whimsical s’mores, or simply enjoy a sweet snack, making marshmallows from scratch is incredibly rewarding and surprisingly straightforward. Get ready to impress yourself and your loved ones with these irresistibly soft and fresh marshmallows that truly taste like a dream!
Ingredients You’ll Need
Don’t let the ingredient list intimidate you—each component is simple, easy to find, and plays a crucial role in making your marshmallows delightfully fluffy, sweet, and perfectly textured. Ready to gather your essentials? Here’s exactly what you’ll need:
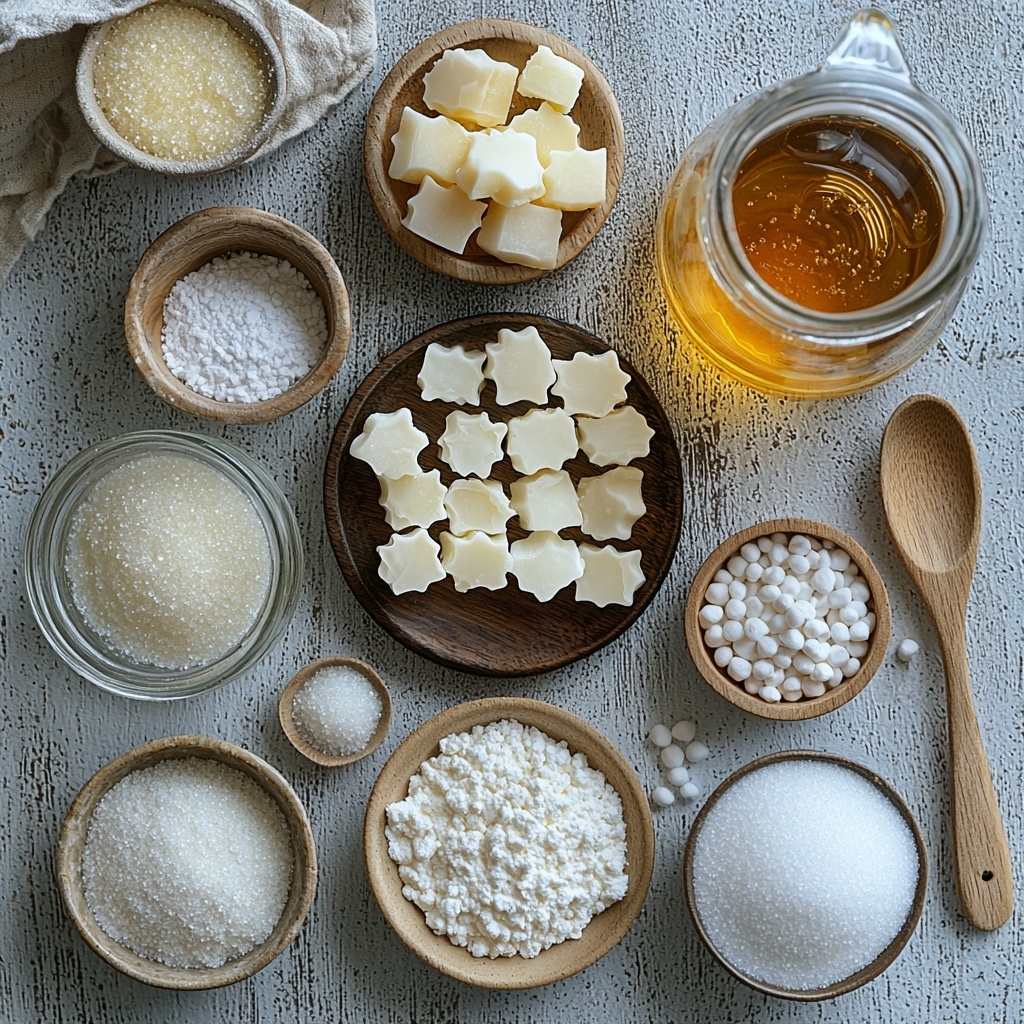
- Nonstick spray: Helps ensure your marshmallows release easily from the pan without sticking.
- ¼ cup powdered sugar: Used to dust the marshmallows, adding a sweet finish and preventing stickiness.
- ¼ cup cornstarch: Mixed with powdered sugar, this keeps each piece from sticking to the others.
- 3 (.25 oz.) envelopes unflavored gelatin: The secret to that signature marshmallow bounce and softness.
- 1 cup cold water (240mL, divided): Hydrates the gelatin and dissolves the sugar for perfect consistency.
- 1⅔ cups granulated sugar (333g): The essential sweetener that balances flavor and structure.
- ½ cup light corn syrup (170mL): Adds sweetness and prevents sugar crystallization for a smooth texture.
- ¼ teaspoon salt: Enhances the sweetness and rounds out the flavors beautifully.
- 2 teaspoons vanilla extract: Or your favorite flavoring to personalize your marshmallows with warm, inviting notes.
How to Make Homemade Marshmallows Recipe
Step 1: Prepare the Dusting Mixture
First, combine the ¼ cup powdered sugar with the ¼ cup cornstarch in a medium bowl. This mixture is the secret weapon for preventing your marshmallows from sticking to everything, so mix it well and set it aside.
Step 2: Prep the Pan
Lightly spray a 9×13-inch baking pan with nonstick spray. Then, dust the bottom and sides with half of the powdered sugar mixture, ensuring a thin, even coating. Don’t forget to return any excess back to the bowl to reuse later—waste not, want not!
Step 3: Cook the Sugar Syrup
In a medium saucepan, combine ½ cup of the cold water, granulated sugar, corn syrup, and salt. Cook covered over medium-high heat for about 3 to 4 minutes until you see the edges simmering. Here’s the key: don’t stir the mixture, which helps achieve the right texture.
Step 4: Bring the Syrup to Soft-Ball Stage
Remove the lid and clip a candy thermometer to the pan. Continue cooking the syrup without stirring until it reaches 240°F, known as the soft-ball stage. This usually takes 7 to 8 minutes. Once reached, immediately take the pan off the heat to stop the cooking process.
Step 5: Bloom the Gelatin
As the syrup cooks, stir the unflavored gelatin into the remaining ½ cup of cold water in the bowl of your stand mixer. Let it bloom for about 5 minutes—this allows the gelatin to soften and ensures your marshmallows will be luxuriously fluffy.
Step 6: Combine Syrup and Gelatin
Start your stand mixer on low speed and slowly drizzle the hot sugar syrup down the side of the bowl into the gelatin mixture. This gradual combining step ensures a smooth, glossy blend without lumps.
Step 7: Whip to Fluffy Perfection
Once all syrup is added, crank the mixer up to high speed and whip for 6 to 7 minutes until the mixture turns thick, fluffy, and glossy. Add vanilla extract and whip for 30 more seconds to infuse your marshmallows with that classic flavor.
Step 8: Spread and Set
Pour your fluffy marshmallow batter into the prepared pan, smoothing it out evenly. Sprinkle with more of the powdered sugar mixture and let the marshmallows set uncovered for at least 4 hours, though overnight is perfect for the best texture.
Step 9: Cut into Squares
Once set firm, invert the pan onto a cutting board and cut the marshmallows into 1-inch squares. A pizza cutter, large knife, or even unflavored dental floss dusted with the powdered sugar mixture works beautifully for clean cuts.
Step 10: Dust and Toss
Coat every side of each marshmallow with the powdered sugar mixture to prevent sticking. You can toss them gently in a colander to remove excess powder, ensuring your final marshmallows aren’t powdery but perfectly coated.
Step 11: Store and Enjoy!
Store your fresh Homemade Marshmallows Recipe treats in an airtight container at room temperature, and enjoy them within 3 weeks for unmatched freshness.
How to Serve Homemade Marshmallows Recipe
Garnishes
Sprinkle your marshmallows with a hint of cocoa powder, finely grated chocolate, or colorful toasted coconut flakes to add a fun twist and extra flavor dimension. They also look adorable dusted lightly with edible glitter or dipped partially in melted chocolate for a party-ready treat!
Side Dishes
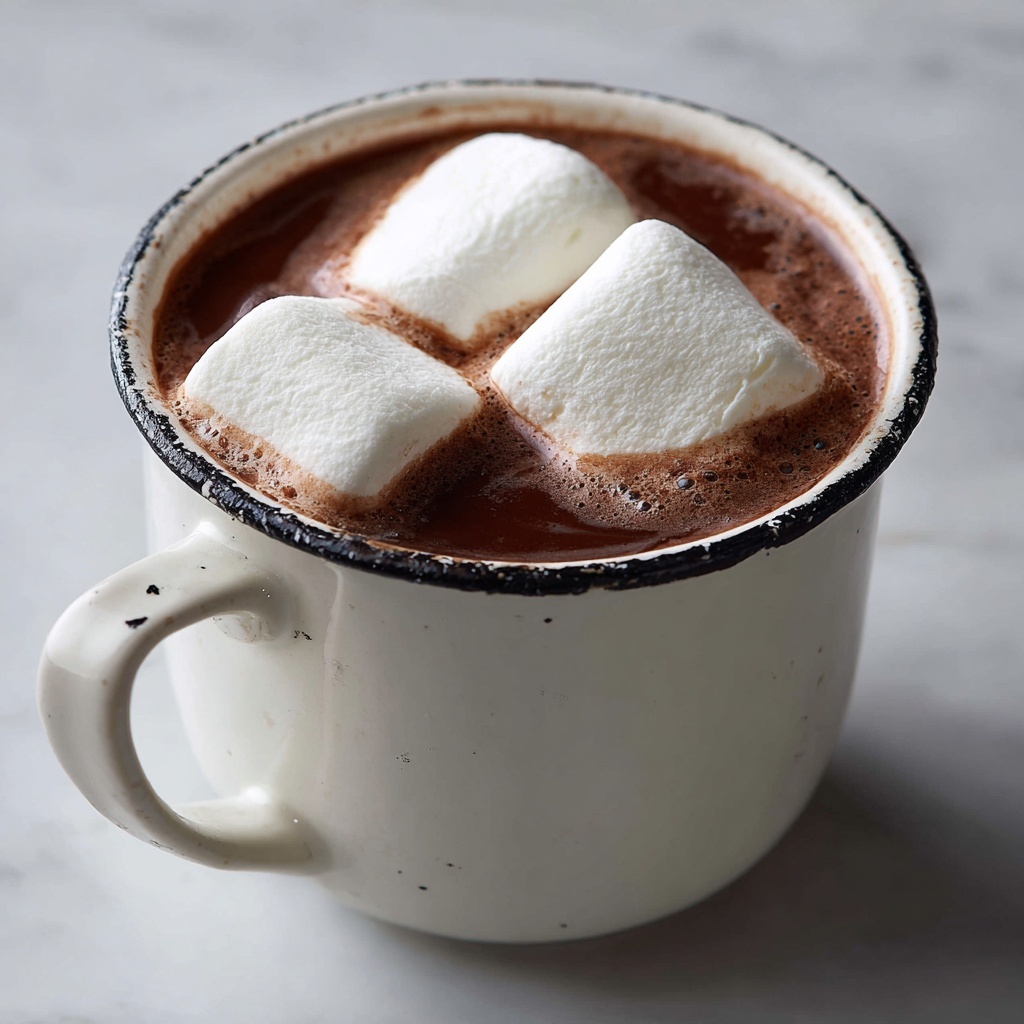
These marshmallows pair wonderfully with classic hot chocolate or a rich cup of coffee to add a creamy, sweet touch. Try skewering them alongside fresh berries or pairing with graham crackers and melted chocolate for an easy s’mores station everyone will love.
Creative Ways to Present
Cut marshmallows into festive shapes using cookie cutters for holidays or special occasions. Layer them in clear jars for gifts or display them artistically on dessert trays alongside other sweet treats. The fluffy texture makes them a charming edible decoration as well!
Make Ahead and Storage
Storing Leftovers
Once cut, keep your homemade marshmallows in an airtight container at room temperature. They’ll stay soft and fresh for up to three weeks, making them great for enjoying over time or preparing well in advance for gatherings.
Freezing
If you want to keep them longer, freeze your marshmallows separated by parchment paper to prevent sticking. When properly stored, they keep their texture and flavor well up to three months. Simply thaw at room temperature before serving.
Reheating
Marshmallows are best enjoyed at room temperature. If they feel a little firm after freezing, let them sit out for about 30 minutes to regain softness naturally. Avoid microwaving as it can cause uneven melting or become sticky.
FAQs
Can I use flavored gelatin instead of unflavored?
While flavored gelatin might seem tempting, unflavored gelatin is ideal to control the final taste and texture of your marshmallows. Adding your own vanilla or other flavorings lets you customize flavors without unintended taste interference.
What’s the purpose of corn syrup in this recipe?
Corn syrup prevents sugar crystals from forming, ensuring the texture of your marshmallows remains smooth and chewy rather than grainy. It’s a key ingredient for that perfect, soft bite.
Can I make this recipe without a candy thermometer?
A candy thermometer makes this recipe much easier and more reliable, helping you hit the exact temperature for the syrup. Without it, results can vary, so it’s highly recommended to invest in one if you plan to make marshmallows regularly.
How do I know when the marshmallows are fully set?
After letting the marshmallow mixture rest for at least 4 hours or overnight, it should feel firm but springy to the touch and hold its shape well. If it’s sticky or too soft, give it more time to set.
Can I use other flavor extracts besides vanilla?
Absolutely! Feel free to experiment with almond, peppermint, citrus, or even coffee extracts. Adding your favorite flavors is a fun way to personalize your Homemade Marshmallows Recipe to suit any taste or occasion.
Final Thoughts
Making your own marshmallows is one of those joyful kitchen adventures that feels like a sweet celebration every time. With this Homemade Marshmallows Recipe, you not only get to enjoy fresh, fluffy marshmallows but also carry the satisfaction of creating something truly special with your own hands. So grab your ingredients, roll up your sleeves, and dive into this delightful homemade treat—you won’t regret it!
Print
Homemade Marshmallows Recipe
- Prep Time: 255 minutes
- Cook Time: 12 minutes
- Total Time: 267 minutes
- Yield: Approximately 100 large marshmallows
- Category: Dessert
- Method: Stovetop
- Cuisine: American
- Diet: Vegetarian
Description
Delight in the sweet, fluffy goodness of homemade marshmallows made from scratch using simple ingredients like gelatin, sugar, and vanilla. Perfectly soft with a melt-in-your-mouth texture, these marshmallows are ideal for snacking, roasting, or adding to your favorite recipes.
Ingredients
Dry Ingredients
- ¼ cup powdered sugar
- ¼ cup cornstarch
- 3 (.25 oz.) envelopes unflavored gelatin
- 1⅔ cups granulated sugar (333g)
- ¼ teaspoon salt
Wet Ingredients
- 1 cup cold water (240mL), divided
- ½ cup light corn syrup (170mL)
- 2 teaspoons vanilla extract (or other flavoring)
Other
- Nonstick spray
Instructions
- Prepare the coating mixture: Combine the ¼ cup powdered sugar and ¼ cup cornstarch in a medium bowl. This mixture will be used to prevent the marshmallows from sticking.
- Prepare the pan: Lightly spray a 9×13-inch baking pan with nonstick spray, then dust it with half of the powdered sugar and cornstarch mixture, coating the bottom and sides. Return any excess coating back to the bowl.
- Cook the sugar syrup: In a medium saucepan, combine ½ cup of the cold water, granulated sugar, light corn syrup, and salt. Cook covered over medium-high heat for 3 to 4 minutes until the edges start to simmer, avoiding stirring to prevent crystallization.
- Heat to soft-ball stage: Uncover the pan, clip a candy thermometer to the side, and cook further until the mixture reaches 240°F (116°C), taking about 7 to 8 minutes. Do not stir during this time. Remove the pan off the heat immediately when the target temperature is reached.
- Bloom the gelatin: Stir the gelatin envelopes into the remaining ½ cup cold water in the bowl of a stand mixer and let it soak (bloom) for about 5 minutes until it becomes swollen.
- Combine gelatin and syrup: Turn the mixer to low and slowly pour the hot sugar syrup down the side of the bowl into the bloomed gelatin, mixing gently to avoid splashing.
- Whip the mixture: Increase mixer speed to high and whip the mixture for 6 to 7 minutes until it is very thick, fluffy, and glossy. Add vanilla extract and whip for an additional 30 seconds to incorporate flavor.
- Set the marshmallow: Spread the marshmallow mixture evenly into the prepared pan. Dust the top with more powdered sugar and cornstarch mixture. Let the marshmallows sit uncovered at room temperature for at least 4 hours, preferably overnight, to set completely.
- Cut the marshmallows: Once set, turn the marshmallow slab out onto a cutting board. Slice into 1-inch squares using a pizza cutter, large knife, or unflavored dental floss dusted with the powdered sugar mixture to prevent sticking.
- Coat and finish: Dust each side of every marshmallow piece with the powdered sugar mixture. Toss the marshmallows in a colander to remove excess powdered sugar mixture.
- Store properly: Keep marshmallows in an airtight container at room temperature for up to 3 weeks, maintaining their freshness and softness.
Notes
- Use a candy thermometer for accurate sugar temperature to ensure proper texture.
- Do not stir the sugar syrup while cooking to prevent crystallization.
- For flavored marshmallows, substitute vanilla extract with other extracts such as peppermint or almond.
- Ensure gelatin is fully bloomed before combining with sugar syrup for best results.
- Store marshmallows in a cool, dry place to maintain softness.
- Use nonstick spray and powdered sugar mixture to prevent marshmallows from sticking to the pan and cutters.


