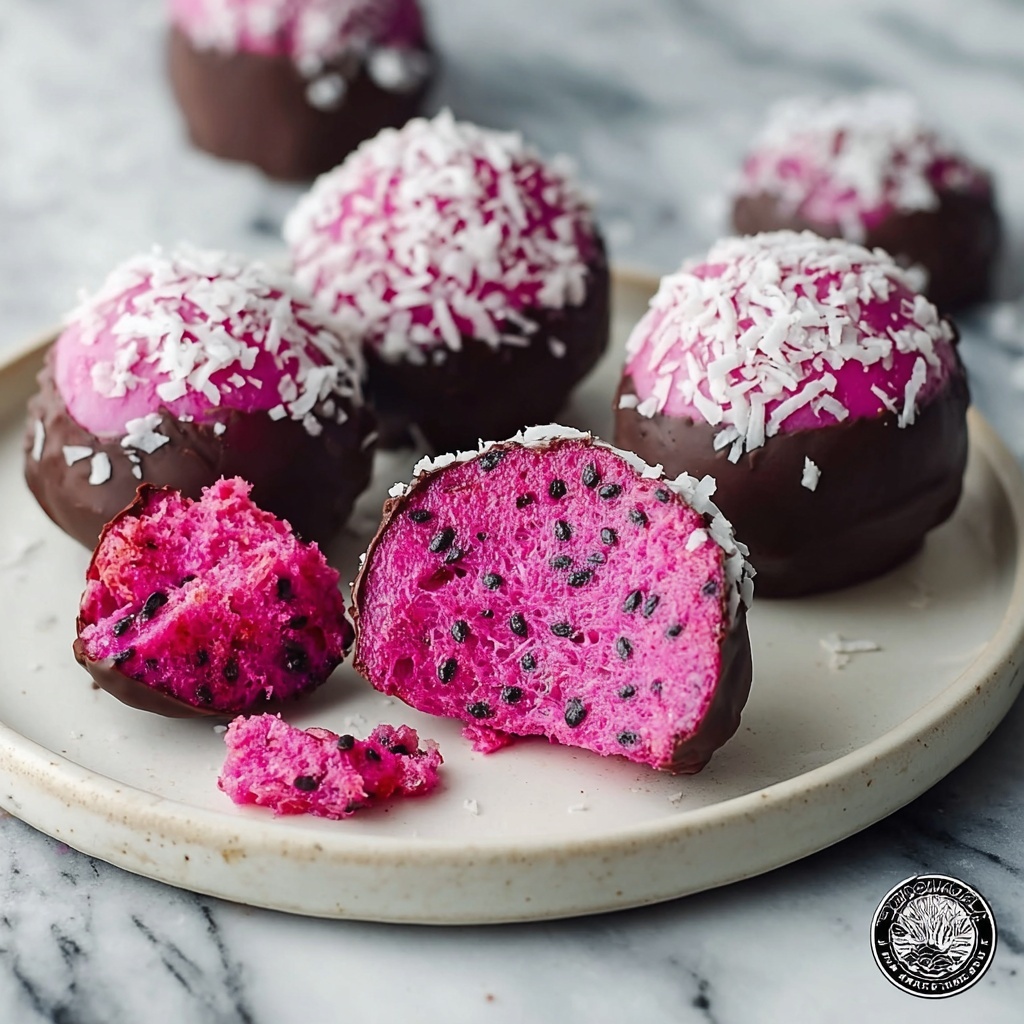
If you’re on the lookout for a dessert that feels both exotic and wholesome, you have to try the Dark Chocolate Dragon Fruit Coconut Treats Recipe. These delightful bites combine the tropical sweetness of pitaya, the rich indulgence of dark chocolate, and the satisfying chewiness of shredded coconut into a treat that’s as beautiful as it is delicious. From their vibrant hues to their perfect balance of flavors, they’re an easy way to elevate your snack game or impress guests with something unexpected yet incredibly comforting.
Ingredients You’ll Need
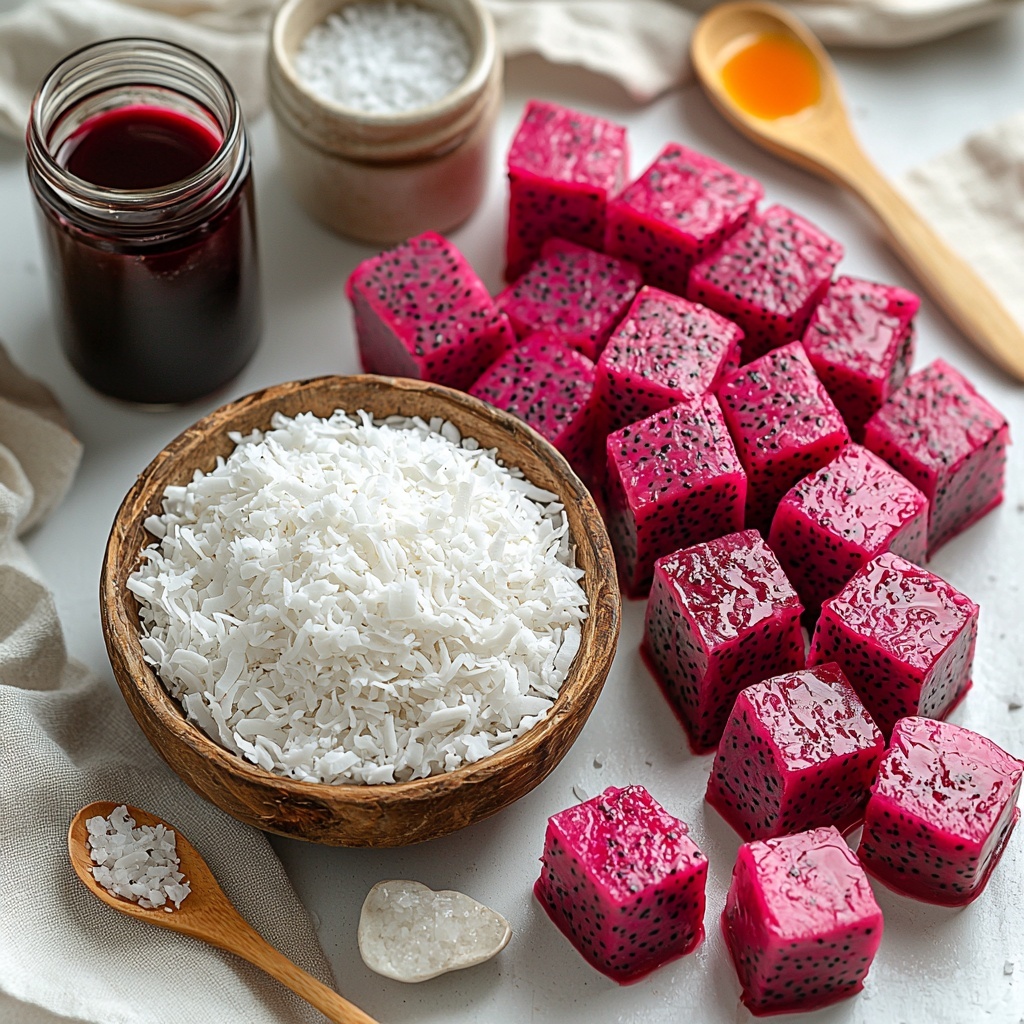
Don’t let the simplicity of this ingredient list fool you. Each component plays a starring role in shaping the flavor, texture, and colorful appeal of these treats. From creamy shredded coconut bringing chewiness to fresh dragon fruit adding juicy brightness, every item is essential.
- 2 cups Unsweetened Shredded Coconut: Provides a naturally chewy, nutty base that’s not too sweet and full of texture.
- 1 cup Pitaya (Dragon Fruit) Cubes: Adds a flashy pink color and a mildly sweet, tropical flavor; great for freshness and vibrancy.
- 1/4 cup Maple Syrup: Sweetens gently with a touch of richness that pairs perfectly with the coconut and fruit.
- 1/4 teaspoon Sea Salt: Just a pinch to enhance all the natural flavors and balance sweetness without overpowering.
- 1 cup Dark Chocolate (70-72%): Delivers that deep, bittersweet coating that contrasts beautifully with the light fruitiness.
- 1 tablespoon Beet Juice (Optional): Infuses an extra bright pink color and subtle earthiness, but pomegranate juice is a fantastic alternative.
How to Make Dark Chocolate Dragon Fruit Coconut Treats Recipe
Step 1: Blend the Base
Start by lining a loaf pan with parchment paper to make removal a breeze later on. In your food processor, combine the shredded coconut, pitaya cubes, maple syrup, sea salt, and optional beet juice. Blend until the mixture comes together as a sticky, colorful dough. This is the heart of your treats, so aim for a consistency that holds without being too dry or overly wet. If you decide to skip beet juice, don’t worry—your treats will still look and taste fantastic!
Step 2: Shape and Chill the Dough
Once your dough is ready, press it firmly into the lined loaf pan. You can also form it into bars or small balls on a parchment-lined baking sheet if you prefer. This chilling step is key: refrigerate for several hours or best overnight to let the flavors meld and the dough firm up, making it easier to dip and cut later.
Step 3: Melt the Chocolate
While the base chills, get your chocolate ready. Melt the dark chocolate gently over low heat using a double boiler—this prevents burning and keeps the chocolate smooth and glossy. Stir occasionally so it melts evenly. The rich chocolate coating will give these treats their decadent finishing touch.
Step 4: Dip and Set
When the coconut dough is firm, cut it into your favorite shapes—whether bars, squares, or fun bites. Use a fork to dip each piece into the melted chocolate, letting the excess drip off. Place the chocolate-coated bites back onto parchment paper in a single layer. The contrast of the dark chocolate against the vivid pink and white interior looks stunning and inviting.
Step 5: Cool and Enjoy
Let the treats cool at room temperature, or if you’re in a hurry, pop them in the fridge briefly to harden the chocolate coating. For the best eating experience, take them out about 15 minutes before serving so they soften slightly and offer that perfect bite with a tender interior and crisp chocolate shell.
How to Serve Dark Chocolate Dragon Fruit Coconut Treats Recipe
Garnishes
To add a little extra pizazz, sprinkle shredded coconut flakes or freeze-dried dragon fruit bits over the chocolate before it sets. A light dusting of finely chopped nuts like pistachios or toasted coconut can also elevate the look and provide additional texture.
Side Dishes
These treats pair wonderfully with a cup of hot herbal tea, a bright smoothie, or even a fresh fruit salad for a colorful dessert spread. If you want to keep things simple, a scoop of coconut or vanilla ice cream alongside makes for an indulgent, tropical-comfort combo.
Creative Ways to Present
Think beyond the plate by arranging the treats on a wooden board garnished with edible flowers or tropical leaves. Wrap individual pieces in parchment paper tied with twine for gifting or party favors. You can even serve them atop coconut shells for a fun, thematic presentation that’ll wow your guests.
Make Ahead and Storage
Storing Leftovers
Once made, store your Dark Chocolate Dragon Fruit Coconut Treats in an airtight container in the refrigerator. They’ll keep fresh for up to one week, maintaining both flavor and texture. The cool temperature also helps preserve the chocolate coating’s crispness.
Freezing
If you want to make these treats ahead of time or save extras, freezing is a great option. Place them in a single layer on parchment paper and freeze until firm. Then transfer to a freezer-safe container or bag. They can last up to a month frozen without losing their taste or texture.
Reheating
There’s no real need to reheat these treats. Simply thaw frozen pieces in the fridge for a few hours or at room temperature for 10–15 minutes before serving. This brings back their perfect chewy and creamy texture without compromising the chocolate shell.
FAQs
Can I use fresh coconut instead of shredded coconut?
Fresh coconut might add too much moisture and alter the texture of the treats. Shredded coconut or desiccated coconut is better for achieving that ideal chewy consistency without being soggy.
Is it necessary to use dark chocolate?
While dark chocolate offers a lovely bittersweet contrast, you can certainly use semi-sweet or even milk chocolate if you prefer something sweeter. Just keep in mind it will change the flavor profile slightly.
Can I make this recipe vegan?
Yes! Using maple syrup instead of honey and choosing a dairy-free dark chocolate ensures this recipe stays vegan-friendly without sacrificing taste.
What if I don’t have pitaya or dragon fruit available?
Feel free to substitute with mango or banana cubes for different but equally delicious tropical notes. The texture and consistency will hold up well with those options.
How long does it take for the chocolate to set?
The chocolate usually hardens within 15 to 30 minutes in the refrigerator. At room temperature, it might take around an hour depending on your environment’s warmth.
Final Thoughts
There’s something truly special about the Dark Chocolate Dragon Fruit Coconut Treats Recipe that makes it a keeper in the dessert rotation. Bright, sweet, and decadent all at once, these treats are simple enough to whip up any day of the week but impressive enough to serve at special gatherings. Give them a try—once you do, you’ll understand why they quickly become a favorite for all seasons and moods.
Print
Dark Chocolate Dragon Fruit Coconut Treats Recipe
- Prep Time: 20 minutes
- Cook Time: 0 minutes
- Total Time: 2 hours 15 minutes
- Yield: 12 servings
- Category: Snack
- Method: No-Cook
- Cuisine: Fusion
- Diet: Vegetarian
Description
These Dark Chocolate Dragon Fruit Coconut Treats are a deliciously healthy no-bake snack combining the tropical flavors of dragon fruit, rich shredded coconut, and decadent dark chocolate. Sweetened naturally with maple syrup and enhanced with a touch of sea salt, these treats are easy to make and perfect for satisfying your sweet tooth with guilt-free ingredients. The optional beet juice adds a beautiful vibrant color, making these treats as visually appealing as they are tasty.
Ingredients
Main Ingredients
- 2 cups Unsweetened Shredded Coconut (or desiccated coconut)
- 1 cup Pitaya (Dragon Fruit) Cubes (can substitute with mango or banana)
- 1/4 cup Maple Syrup (or honey, agave syrup)
- 1/4 teaspoon Sea Salt
Chocolate Coating
- 1 cup Dark Chocolate (70-72%, or semi-sweet chocolate)
- 1 tablespoon Beet Juice (optional, can substitute with pomegranate juice)
Instructions
- Prepare the Pan and Mix Ingredients: Line a loaf pan with parchment paper to prevent sticking. In a food processor, combine the unsweetened shredded coconut, pitaya cubes, maple syrup, and sea salt. Blend the mixture until it forms a dough. If you choose to use beet juice for color, add it during blending and mix until the dough is vibrantly colored.
- Shape the Treats: Press the dough firmly into the prepared loaf pan to create an even layer. Alternatively, shape the dough into bars or balls on a parchment-lined baking sheet for individual portions. Refrigerate for several hours or preferably overnight to allow the treats to set firmly.
- Melt the Chocolate: Set up a double boiler by placing a heatproof bowl over a pot of simmering water. Add the dark chocolate and melt it gently over low heat, stirring frequently until it becomes smooth and glossy. Be careful not to burn the chocolate by avoiding overheating.
- Cut and Dip Treats: Once the dough has fully set, remove it from the loaf pan and cut into your preferred shapes and sizes. Using a fork, dip each piece into the melted chocolate, allowing any excess chocolate to drip off before placing the treats back onto the parchment paper.
- Set the Chocolate Coating: Let the chocolate-coated treats cool at room temperature or place them briefly in the refrigerator to harden the chocolate shell. For the best texture and flavor, serve the treats after about 15 minutes at room temperature.
Notes
- You can substitute dragon fruit with mango or banana for a different flavor profile.
- Maple syrup can be replaced with honey or agave syrup depending on your preference.
- Using beet juice is optional but adds a beautiful natural color to the treats.
- Store the treats in an airtight container in the refrigerator for up to one week.
- Ensure chocolate doesn’t overheat while melting to maintain a smooth texture.


