
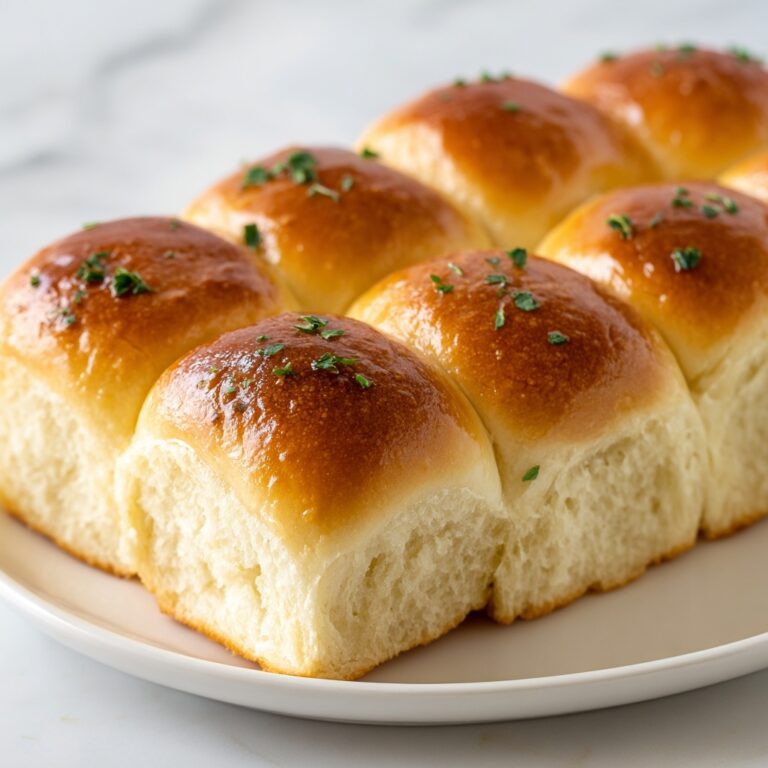
If you are on the hunt for a snack that combines melty, cheesy goodness with a sweet, pillowy bun, look no further than the Ultimate Mini Grilled Cheese Hawaiian Rolls Recipe. This irresistible creation brings together the classic comfort of grilled cheese with the tropical sweetness of Hawaiian rolls, creating a perfect bite-sized indulgence that’s just as fun to make as it is to eat. Whether you’re hosting a party, craving a cozy treat, or simply want an easy yet impressive appetizer, these mini sandwiches deliver layers of flavor and texture that will have everyone asking for seconds.
Ingredients You’ll Need
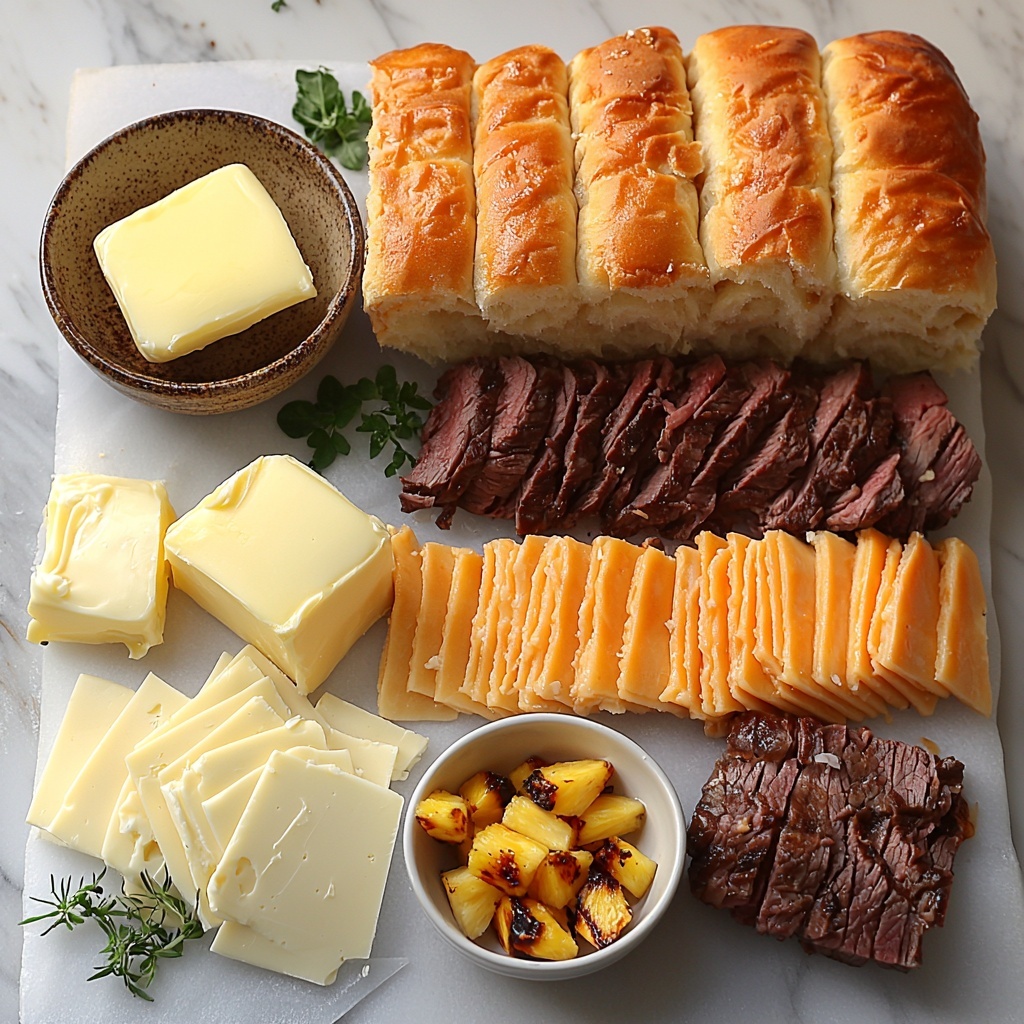
The beauty of the Ultimate Mini Grilled Cheese Hawaiian Rolls Recipe is in its simplicity, with each ingredient playing a crucial role in building its unforgettable flavor and texture. From the soft sweetness of the rolls to the rich blend of cheeses, every element is essential.
- Hawaiian Sweet Rolls: The soft, sweet base that balances the savory cheeses perfectly and adds a unique tropical touch.
- Butter (Unsalted is Best): Essential for that golden, crispy crust and for enhancing the richness without overpowering the other flavors.
- Sharp Cheddar: Adds a tangy depth and sharp contrast to the sweet rolls.
- Monterey Jack: Melts beautifully and offers a creamy, mild flavor that complements the sharpness of cheddar.
- Provolone or Gruyère: Provides a nutty, slightly smoky note and a stretchy melt to the sandwich.
- Thinly Sliced Cooked Beef (optional): For those craving a savory, hearty twist that pairs wonderfully with the sweet rolls.
- Grilled Pineapple Bits (optional): Introduce a burst of tangy sweetness and texture, elevating the tropical theme even further.
How to Make Ultimate Mini Grilled Cheese Hawaiian Rolls Recipe
Step 1: Prepare Your Rolls
Start by carefully slicing your slab of Hawaiian sweet rolls horizontally through the middle. This step creates that perfect sandwich structure with connected rolls, allowing you to build layers of deliciousness while keeping everything neatly together for easy grilling.
Step 2: Butter the Bottom Half
Lay the bottom half of your sliced rolls on a cutting board or baking sheet. Spread a generous and even layer of softened butter over the exposed cut side. This butter not only helps the cheese stick but also ensures a rich, golden crust once grilled.
Step 3: Layer the Cheese
Evenly sprinkle about two-thirds of your cheese blend across the buttered bottom half. This mixture of sharp cheddar, Monterey Jack, and provolone or Gruyère creates an irresistible gooey foundation packed with flavor and texture.
Step 4: Add Optional Fillings
If you want to take these sandwiches up a notch, add thinly sliced cooked beef and grilled pineapple bits on top of the cheese. This layer adds a savory, meaty bite and sweet tanginess that plays beautifully with the cheese and rolls.
Step 5: Top with More Cheese
Sprinkle the remaining one-third of your cheese blend over any optional fillings. This final cheesy layer ensures that every bite is filled with luscious melted goodness.
Step 6: Place the Top Half
Carefully position the top half of the Hawaiian rolls slab back over the layered bottom half. Gently press down to secure the fillings without squishing the rolls too much, preparing your masterpiece for grilling.
Step 7: Butter the Exterior
Generously spread softened butter over the entire top surface of the assembled roll slab. This step is key to getting that irresistible golden and crispy finish on both sides of your grilled cheese.
Step 8: Preheat Your Pan or Griddle
Heat a large non-stick skillet or electric griddle over medium-low heat. Preheating slowly helps the cheese to melt evenly and prevents the rolls from burning before they turn beautifully golden.
Step 9: Grill the First Side
Butter the bottom exterior of your assembled roll slab carefully, then place it in the preheated pan with the buttered side down. Let it cook for about 5 to 7 minutes, until the bottom is crisp and golden.
Step 10: Cover and Melt
Place a lid on your skillet or cover the griddle with a heat-safe dome. This traps the heat and steam, helping the cheese to melt perfectly and the inside to warm through without drying out the rolls.
Step 11: Flip and Grill the Second Side
Using a large spatula on top, carefully flip the entire slab over. Continue grilling for another 5 to 7 minutes until the second side boasts the same golden crust and the cheese is completely melted.
Step 12: Slice and Serve
Transfer the grilled slab to a cutting board and, using a serrated knife, slice along the natural perforations to separate your Ultimate Mini Grilled Cheese Hawaiian Rolls sandwiches. Serve warm for the ultimate melty, sweet, and savory bite-sized delight.
How to Serve Ultimate Mini Grilled Cheese Hawaiian Rolls Recipe
Garnishes
For a fresh burst, sprinkle some chopped fresh herbs like parsley or chives on top before serving. A light drizzle of tangy mustard or a swipe of spicy aioli on the side also adds exciting layers of flavor that complement the sweet and cheesy sandwich.
Side Dishes
Pair these mini grilled cheese sandwiches with a simple tomato soup for a classic combo or a crisp garden salad to balance the richness. Fresh-cut veggies with ranch dip or a tangy coleslaw are wonderful options to provide contrasting crunch and refreshing notes.
Creative Ways to Present
Arrange the mini sandwiches stacked on a rustic wooden board or colorful serving platter for a crowd-pleasing appetizer. Tie each sandwich with a cute twine or garnish with tiny skewers holding a pineapple chunk to emphasize the Hawaiian theme.
Make Ahead and Storage
Storing Leftovers
Place any leftover mini grilled cheese sandwiches in an airtight container and refrigerate. They will stay fresh for up to 3 days, making them a perfect snack or quick meal ready to enjoy with minimal fuss.
Freezing
If you want to save these for later, wrap each sandwich individually in plastic wrap and then place them in a freezer-safe bag. They can be frozen for up to a month. This way, you can enjoy the Ultimate Mini Grilled Cheese Hawaiian Rolls Recipe whenever a cheesy craving hits.
Reheating
To reheat, unwrap and place the sandwiches on a baking sheet lined with parchment paper. Heat in a preheated oven at 350°F (175°C) for about 10 to 15 minutes until warmed through and the cheese is melty again. Avoid microwaving as it can lead to soggy rolls.
FAQs
Can I use other types of bread instead of Hawaiian rolls?
While other bread types can work, the signature sweetness and soft texture of Hawaiian rolls are key to this recipe’s unique charm. They create the perfect balance against the savory cheese and optional fillings.
What cheeses work best in this recipe?
A blend of sharp cheddar, Monterey Jack, and either provolone or Gruyère provides the best mix of flavor and meltiness. Feel free to experiment with your favorites, but keep a mix of sharp and creamy cheeses for balance.
Can I make these vegetarian?
Absolutely! Simply omit the cooked beef and enjoy the delicious blend of cheeses with the sweet rolls. You can also add grilled vegetables or mushrooms for extra flavor and texture.
How do I prevent the rolls from getting soggy?
Butter both the interior and exterior generously and grill over medium-low heat. Also, covering the pan allows the cheese to melt thoroughly without overcooking or drying the bread, keeping the rolls perfectly crisp and melty.
Are these sandwiches freezer-friendly?
Yes, these mini grilled cheese sandwiches freeze beautifully when wrapped properly. Freezing allows you to enjoy the Ultimate Mini Grilled Cheese Hawaiian Rolls Recipe anytime without losing their delicious flavor or texture.
Final Thoughts
If you’re ready to treat yourself and your loved ones to a snack that’s bursting with flavor and comfort, you absolutely must try the Ultimate Mini Grilled Cheese Hawaiian Rolls Recipe. It’s simple to make, endlessly customizable, and always a crowd-pleaser. Once you taste the gooey cheese, sweet rolls, and optional savory accents all melted together, you’ll understand why this little sandwich packs such a big punch. Happy grilling!
Print
Ultimate Mini Grilled Cheese Hawaiian Rolls Recipe
- Prep Time: 15 minutes
- Cook Time: 30 minutes
- Total Time: 45 minutes
- Yield: 12 mini grilled cheese sandwiches
- Category: Appetizer
- Method: Frying
- Cuisine: American
Description
Enjoy this Ultimate Mini Grilled Cheese Hawaiian Rolls recipe featuring layers of sharp cheddar, Monterey Jack, and provolone or Gruyère cheeses melted inside buttery Hawaiian sweet rolls. Optional additions like thinly sliced cooked beef and grilled pineapple bits add a delightful savory and sweet twist. Perfectly pan-grilled to golden perfection, this recipe yields a deliciously melty, crowd-pleasing appetizer or snack.
Ingredients
Rolls and Butter
- 1 slab of Hawaiian Sweet Rolls (12 rolls)
- Unsalted Butter, softened (about 6 tablespoons, divided)
Cheese Blend
- 1 cup Sharp Cheddar, shredded
- 1/2 cup Monterey Jack, shredded
- 1/2 cup Provolone or Gruyère, shredded
Optional Fillings
- Thinly Sliced Cooked Beef (about 6 ounces)
- Grilled Pineapple Bits (about 1/2 cup)
Instructions
- Prepare Your Rolls: Carefully slice the entire slab of Hawaiian sweet rolls horizontally through the middle to create a top and bottom half while keeping all rolls connected.
- Butter the Bottom Half: Place the bottom half on a clean cutting board or baking sheet. Spread a generous, even layer of softened butter over the cut side.
- Layer the Cheese: Evenly distribute about two-thirds of the cheese blend over the buttered bottom half of the rolls.
- Add Optional Fillings: If using, layer thinly sliced cooked beef and/or grilled pineapple bits over the cheese.
- Top with More Cheese: Sprinkle the remaining one-third of the cheese blend over the optional fillings.
- Place the Top Half: Carefully set the top half of the rolls back onto the bottom half, pressing down gently to secure.
- Butter the Exterior: Spread softened butter generously over the entire top surface of the assembled roll slab.
- Preheat Your Pan or Griddle: Heat a large non-stick skillet or electric griddle over medium-low heat.
- Grill the First Side: Butter the bottom exterior of the roll slab. Transfer it butter-side down into the preheated pan and cook for 5-7 minutes until golden brown.
- Cover and Melt: Place a lid on the skillet or cover with a heat-safe dome to trap heat and melt the cheese, cooking for 3-5 minutes.
- Flip and Grill the Second Side: Using a large spatula on top, carefully flip the entire slab over. Cook the other side for 5-7 minutes until golden and cheese is melted.
- Slice and Serve: Transfer to a cutting board and use a serrated knife to slice along the perforations, separating individual mini grilled cheese sandwiches. Serve warm.
Notes
- Use softened unsalted butter for easy spreading and best flavor control.
- Keep heat at medium-low to avoid burning while thoroughly melting cheese.
- Customize cheese blends depending on your preference for sharpness or creaminess.
- Optional additions like cooked beef and grilled pineapple add extra savory and sweet flavors but can be omitted for a classic grilled cheese.
- Using a lid or dome is essential to ensure the cheese melts evenly.
- Slice carefully with a serrated knife to maintain sandwich shape.


