If you’re on the lookout for a warm, savory, and utterly satisfying meal that comes together quickly, you’ll absolutely adore this Cheesy Garlic Chicken Wraps Recipe. Packed with tender, garlicky chicken, melty cheese, and just the right kick of spice, these wraps strike the perfect balance between comfort food and a fresh, handheld lunch or dinner. They’re simple enough for a busy weeknight yet special enough to share with friends, bringing together a colorful mix of flavors and textures that everyone will love.
Ingredients You’ll Need
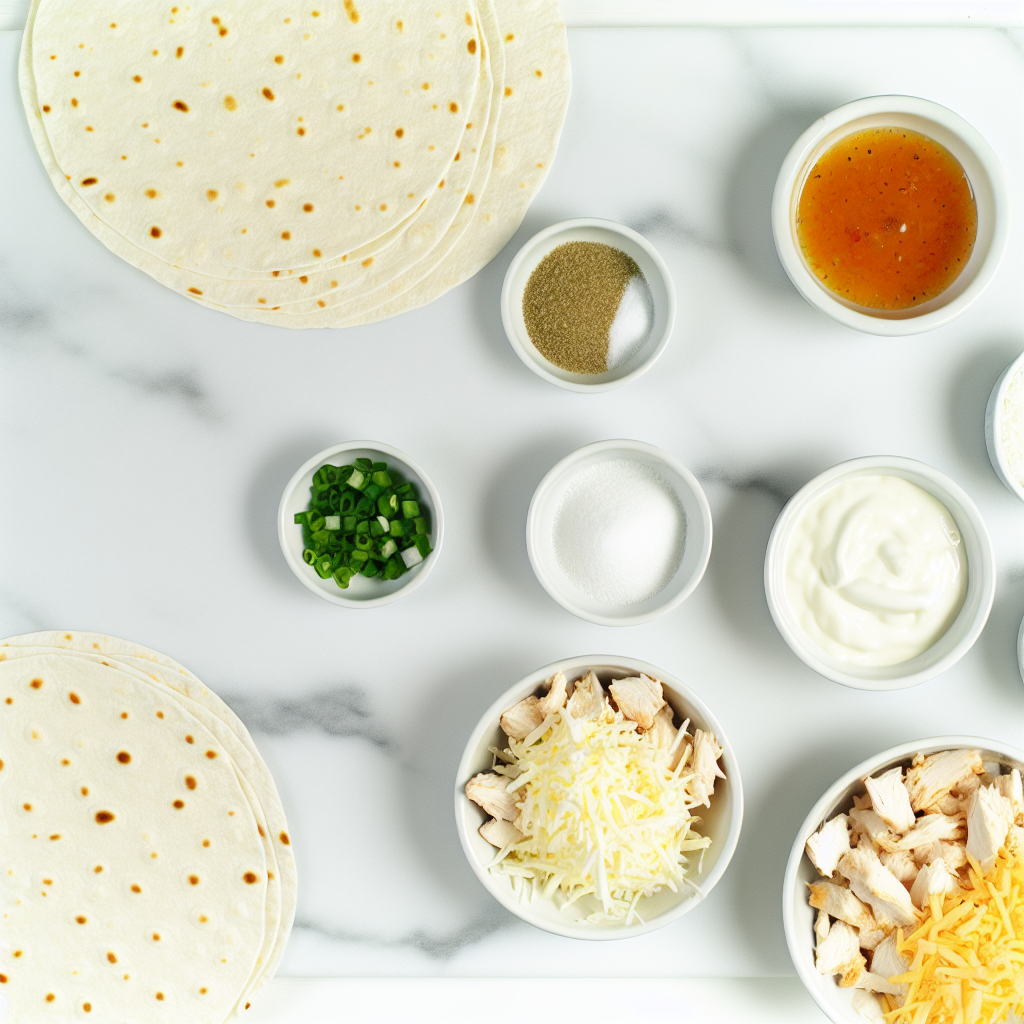
The ingredients for this recipe might be simple, but each one plays a crucial role in boosting the flavor, sneaking in some creamy goodness, or adding that perfect pop of color. You’ll find it’s a fantastic combination that turns everyday pantry staples into something unforgettable.
- 2 large tortillas (regular or low-carb/high-protein): The base that holds everything together and adds a soft, warm texture.
- 7 oz cooked chicken (about 200 g), chopped: Using rotisserie chicken can save you time and lend extra flavor to your wrap.
- 2 garlic cloves, minced or grated: Garlic delivers that irresistible aroma and depth that brighten the whole dish.
- 2 tbsp light mayonnaise: Adds creamy moisture without weighing down the wrap.
- 1 tbsp light Greek yogurt or plain yogurt: Brings tangy freshness and lightens the spread.
- 2 tsp hot sauce (like Frank’s): Just enough heat to awaken your taste buds without overpowering the rest.
- ¼ tsp salt: Enhances all the flavors, making everything taste vibrant.
- 3 oz grated cheese (about 90 g, cheddar blend recommended): Gooey, melty, and the star of the “cheesy” factor.
- 1 green onion, chopped: Adds a mild oniony crunch and a fresh burst of green color.
- Olive oil spray: Perfect for crisping the wraps to golden perfection without extra grease.
How to Make Cheesy Garlic Chicken Wraps Recipe
Step 1: Prepare the Chicken Mixture
Start by combining your chopped cooked chicken, minced garlic, light mayonnaise, Greek yogurt, hot sauce, and a pinch of salt in a bowl. This mixture is your flavor-packed filling, blending creamy, spicy, and garlicky elements. Stir everything well to ensure every bite is loaded with this vibrant concoction.
Step 2: Assemble the Wraps
Lay your tortilla flat and sprinkle about 2 tablespoons of grated cheese on the lower third. Next, spoon around ⅔ cup of the chicken mixture over the cheese, spreading it evenly. Add another tablespoon of cheese on top, then scatter some chopped green onion for freshness. These layers will create a melty, cheesy, and slightly crunchy interior that makes the wraps so crave-worthy.
Step 3: Roll and Fold
Fold in the sides of the tortilla gently, then roll up tightly from the bottom to encase the filling securely. This wrapping technique keeps all that cheesy, garlicky goodness inside while making it easy to crisp the outside evenly.
Step 4: Cook to Perfection
Heat a non-stick pan over medium-high and give it a quick spritz with olive oil spray. Place the wraps seam-side down in the pan and cook each side for 3 to 4 minutes until they turn golden brown and crispy. Cover the pan with a lid while cooking to help the cheese melt beautifully inside.
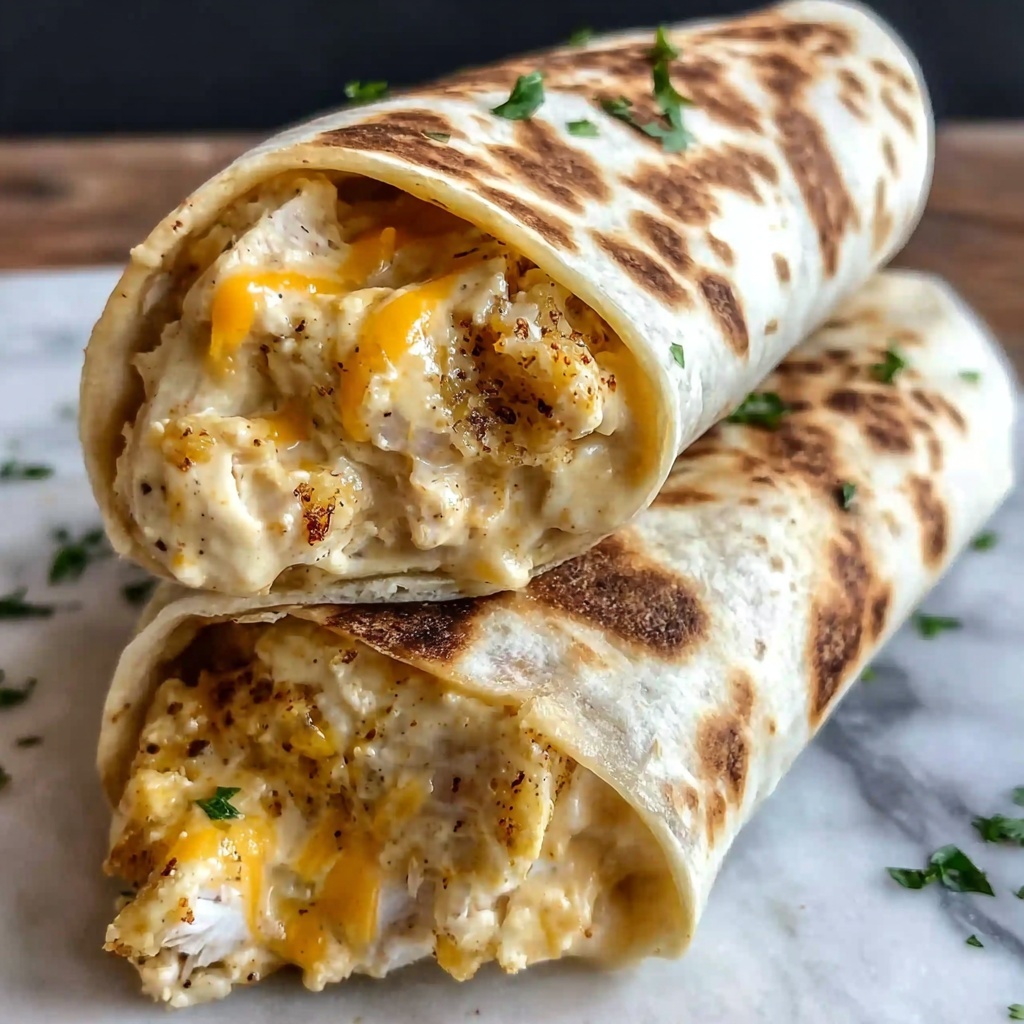
Step 5: Slice and Serve
Once beautifully crisped and melting on the inside, remove your wrap from the pan and slice it in half. These halves reveal the warm, cheesy filling that’s packed with garlicky chicken and just the right spice punch, ready to be enjoyed immediately.
How to Serve Cheesy Garlic Chicken Wraps Recipe
Garnishes
Garnishing your wraps with a sprinkle of extra chopped green onions or a few fresh herbs like cilantro can elevate both flavor and presentation. A drizzle of creamy ranch or a dollop of sour cream adds a cooling contrast to the spicy kick inside.
Side Dishes
Pairing these wraps with a fresh mixed salad, crunchy veggie sticks, or a vibrant salsa adds texture and refreshing elements to your meal. Sweet potato fries or a side of coleslaw also complement the cheesy garlic chicken flavor perfectly, making your meal well-rounded and fulfilling.
Creative Ways to Present
For a fun twist, cut the wraps into bite-sized pinwheels for parties or kids’ lunches. You can also serve them alongside a platter of dips like guacamole, hummus, or a spicy tomato relish to turn this simple wrap into a crowd-pleasing appetizer.
Make Ahead and Storage
Storing Leftovers
If you have any leftover Cheesy Garlic Chicken Wraps Recipe, wrap them tightly in foil or place in an airtight container and store them in the fridge for up to 2 days. The flavors meld wonderfully overnight, but to keep the wrap from becoming soggy, crisp it up when reheating.
Freezing
These wraps can be frozen for longer storage. Wrap each tightly in plastic wrap and then foil before placing in a freezer-safe bag or container. They will keep well for up to 2 months. Freeze them individually so you can thaw and reheat one at a time without waste.
Reheating
To reheat, unwrap and place the wrap seam-side down in a non-stick pan over medium heat. Cover for a couple of minutes to allow the cheese to melt again, flipping once until heated through and crisp all over. Avoid the microwave if possible, as it tends to make tortillas soggy rather than crispy.
FAQs
Can I use another type of cheese instead of cheddar blend?
Absolutely! While a cheddar blend adds sharpness and great meltability, mozzarella, Monterey Jack, or even a pepper jack cheese would work wonderfully depending on your taste preferences.
Is it okay to use raw chicken instead of cooked chicken?
It’s best to use cooked chicken to save time and ensure the chicken is safe to eat. If using raw chicken, you’ll need to cook it thoroughly, chop it finely, and then proceed with the recipe, but rotisserie or leftover cooked chicken is perfect.
How spicy is the hot sauce in this wrap?
The recipe uses a moderate amount of hot sauce that offers a gentle heat, enhancing the flavor without overwhelming most palates. You can always adjust the amount to suit your heat tolerance.
Can I prepare the chicken mixture in advance?
Yes! The chicken mixture can be made up to 24 hours ahead, which actually helps the flavors deepen. Just cover it tightly and keep it in the fridge until you’re ready to assemble your wraps.
What can I substitute for mayonnaise and yogurt if I want it dairy-free?
You might try using dairy-free mayo and coconut or almond-based yogurt substitutes. This will help keep the creamy texture and tang without the dairy.
Final Thoughts
There’s something truly comforting about cozy, crispy wraps filled with cheesy garlic chicken that hits every note in your cravings. This Cheesy Garlic Chicken Wraps Recipe is a keeper for quick dinners, lunchbox upgrades, or anytime you want a little indulgence without the fuss. Give it a try, and I promise it’ll become one of your go-to recipes as well — enjoy every delicious bite!
Print
Cheesy Garlic Chicken Wraps Recipe
- Prep Time: 15 minutes
- Cook Time: 7 minutes
- Total Time: 22 minutes
- Yield: 2 servings
- Category: Lunch
- Method: Frying
- Cuisine: American
- Diet: Low Fat
Description
These Cheesy Garlic Chicken Wraps are a quick and delicious meal perfect for lunch or a light dinner. Packed with tender cooked chicken, garlic, and melted cheddar cheese, combined with a tangy and spicy sauce, then toasted to golden perfection in a skillet. They offer a satisfying blend of creamy, spicy, and savory flavors wrapped in soft tortillas, ideal for a comforting yet easy-to-make dish.
Ingredients
Wraps
- 2 large tortillas (regular or low-carb/high-protein)
Chicken Filling
- 7 oz cooked chicken (about 200 g), chopped (rotisserie works great)
- 2 garlic cloves, minced or grated
- 2 tbsp light mayonnaise
- 1 tbsp light Greek yogurt or plain yogurt
- 2 tsp hot sauce (like Frank’s)
- ¼ tsp salt
Cheese and Garnish
- 3 oz grated cheese (about 90 g, cheddar blend recommended)
- 1 green onion, chopped
Cooking
- Olive oil spray
Instructions
- Prepare the chicken mixture: In a bowl, combine the chopped cooked chicken, minced garlic, light mayonnaise, light Greek yogurt, hot sauce, and salt. Mix well until all ingredients are evenly incorporated.
- Assemble the wrap: Lay one tortilla flat on a clean surface. On the lower third of the tortilla, sprinkle approximately 2 tablespoons of the grated cheese. Spoon about ⅔ cup of the chicken mixture over the cheese. Add another tablespoon of grated cheese on top, then sprinkle with chopped green onion for freshness.
- Fold and roll the wrap: Fold in the sides of the tortilla tightly, then roll it up from the bottom to enclose the filling securely, creating a tight wrap.
- Cook the wraps: Heat a non-stick pan over medium-high heat and spray lightly with olive oil. Place the wraps seam-side down into the pan. Cook for 3 to 4 minutes on each side, pressing slightly and covering with a lid to help melt the cheese inside, until the wraps are golden brown and crispy.
- Serve: Remove from the pan, slice each wrap in half, and serve warm. They pair wonderfully with a fresh salad, salsa, or raw veggies on the side.
Notes
- Rotisserie chicken saves time and adds great flavor but you can use any cooked chicken.
- Adjust the hot sauce to your preferred spice level or substitute with sriracha or your favorite chili sauce.
- For a healthier option, choose whole wheat or low-carb tortillas.
- You can substitute the cheddar blend cheese with mozzarella or Monterey Jack for a different melt and flavor.
- Covering with a lid while cooking helps melt the cheese evenly inside the wrap.
- Wraps are best served immediately for the crispiest texture; leftovers can be reheated in a skillet or oven.
