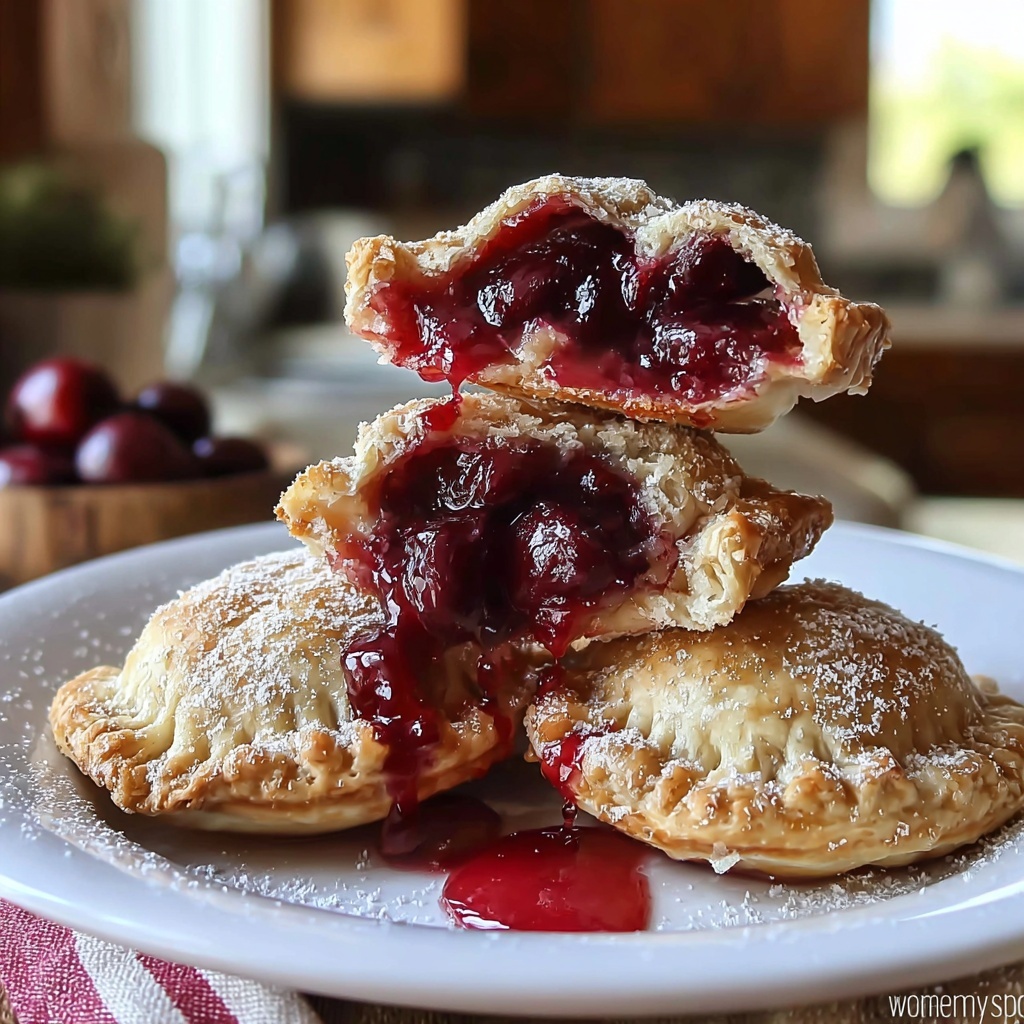
If you have a sweet tooth and love bite-sized treats that pack a burst of fruity goodness, then this Cherry Pie Bombs Recipe is about to become your new favorite indulgence. Imagine flaky, golden puff pastry pockets bursting with luscious cherry filling that’s sweet, tangy, and perfectly spiced—all wrapped up in an irresistible pop-in-your-mouth shape. These little delights are not only incredibly easy to make but also impressively versatile, making them the perfect crowd-pleaser for any occasion, whether it’s a casual snack, a party appetizer, or a charming dessert.
Ingredients You’ll Need
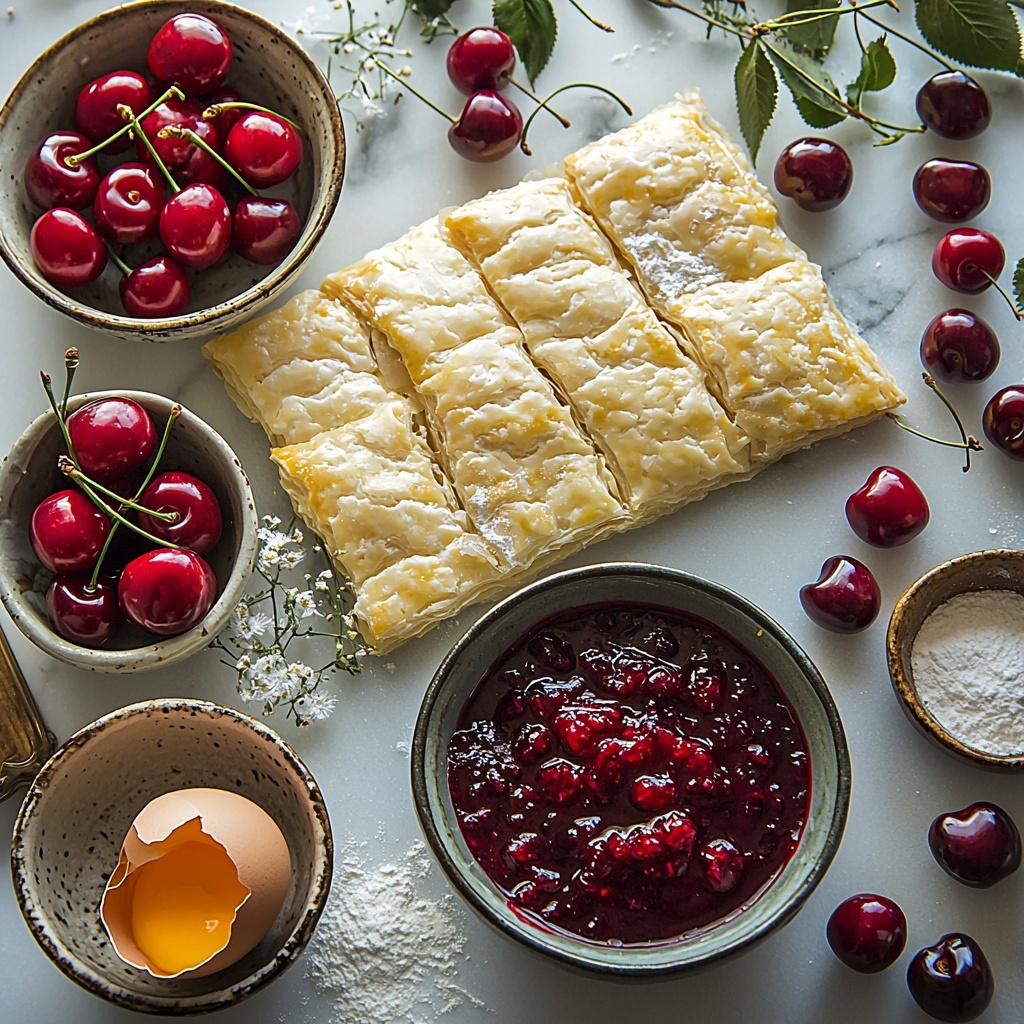
Each ingredient in this Cherry Pie Bombs Recipe plays a crucial role in balancing texture, flavor, and visual appeal. From flaky pastry to vibrant cherry filling, these simple essentials come together to create something truly magical.
- 1 sheet puff pastry (thawed): The buttery, flaky base that puffs up beautifully during baking to hold all the cherry goodness.
- 1 cup cherry filling (fresh or canned): The star of the show, offering a sweet and tart burst in every bite.
- 1/4 cup granulated sugar: Sweetens the filling just right without overpowering the natural cherry flavor.
- 2 tablespoons cornstarch: Thickens the cherry filling so it stays perfectly inside the pastry bombs.
- 1 egg (for egg wash): Gives the pie bombs that beautiful golden shine and helps seal the edges.
- Powdered sugar (for dusting, optional): Adds a delicate finishing touch that makes these treats look as good as they taste.
How to Make Cherry Pie Bombs Recipe
Step 1: Prepare the Puff Pastry
Start by preheating your oven to 400°F (200°C) to ensure it’s hot and ready for baking. Roll out your thawed puff pastry on a floured surface until it’s about 1/8 inch thick—thin enough to be flaky but strong enough to hold the cherry filling without breaking.
Step 2: Mix the Cherry Filling
In a bowl, combine your cherry filling with granulated sugar and cornstarch, mixing until everything is evenly incorporated. This mixture will thicken nicely when baked, preventing any sogginess and making every bite luscious.
Step 3: Cut and Fill the Pastry Circles
Using a round cutter or even a glass, cut circles out of the pastry sheet. Spoon a small amount of the cherry filling right into the center of each circle—don’t overfill, or the bombs might burst during baking.
Step 4: Seal the Pie Bombs
Fold each circle in half to enclose the filling, then pinch the edges firmly. For a charming touch and extra security, press the edges with a fork, which adds a pretty crimped effect.
Step 5: Bake to Golden Perfection
Place the sealed pie bombs on a parchment-lined baking sheet. Brush each one lightly with beaten egg to achieve that irresistible golden gloss. Bake for 15–20 minutes until the pastry is puffed and golden brown.
Step 6: Finishing Touches
Once out of the oven, let the Cherry Pie Bombs cool just a little. Then, dust with powdered sugar for that beautiful, bakery-style look and a hint of added sweetness.
How to Serve Cherry Pie Bombs Recipe
Garnishes
These Cherry Pie Bombs are just delightful on their own, but if you want to elevate the presentation, consider a sprinkle of powdered sugar or a drizzle of homemade vanilla glaze. Fresh mint leaves also add a pop of color and a fresh aroma that complements the cherries perfectly.
Side Dishes
Pair your Cherry Pie Bombs with a scoop of vanilla ice cream or a dollop of whipped cream to create an indulgent dessert spread. Fresh berries or a light fruit salad can add a refreshing contrast, balancing the richness of the pastry.
Creative Ways to Present
For parties, serve these bombs in mini cupcake liners or on a tiered dessert stand for an eye-catching display. You can also thread them onto skewers with fresh fruit for fun, handheld treats that guests will adore.
Make Ahead and Storage
Storing Leftovers
Store any leftover Cherry Pie Bombs in an airtight container at room temperature for up to two days. This helps maintain their flaky texture without drying out the filling.
Freezing
If you want to prepare these in advance, freeze the unbaked bombs on a parchment-lined tray until firm, then transfer to a freezer bag. When you’re ready, bake them straight from frozen, adding a few extra minutes to the baking time.
Reheating
Reheat leftover or frozen-and-baked Cherry Pie Bombs in a preheated oven at 350°F (175°C) for 5–10 minutes. This refreshes the puff pastry’s crispiness without making the filling soggy.
FAQs
Can I use frozen cherries for the cherry filling?
Absolutely! Frozen cherries work wonderfully, just thaw and drain any excess liquid before mixing with sugar and cornstarch to avoid soggy pastry.
What can I substitute for puff pastry?
If puff pastry is unavailable, pie crust dough can be used, though it won’t puff up as much. Just be sure to roll it thin and bake until golden.
Is it possible to make these gluten-free?
Yes, using a gluten-free puff pastry will work just fine. Just be mindful of the baking time, as gluten-free dough can brown more quickly.
Can I make these vegan?
To make this Cherry Pie Bombs Recipe vegan, use a vegan puff pastry and replace the egg wash with a plant-based milk or a mixture of maple syrup and water for a glossy finish.
How do I prevent the filling from leaking out?
Seal the edges of each pie bomb carefully, and don’t overfill them. Using a fork to press the edges adds an extra seal to keep the filling safely inside during baking.
Final Thoughts
This Cherry Pie Bombs Recipe feels like a little burst of joy in every bite, combining simplicity with incredible flavor and texture. Whether you’re baking for family, friends, or just because you deserve a treat, these charming hand pies are sure to bring smiles all around. So get your pastry rolling and cherries ready—these delightful bombs are waiting to steal the show at your next gathering!
Print
Cherry Pie Bombs Recipe
- Prep Time: 20 minutes
- Cook Time: 20 minutes
- Total Time: 40 minutes
- Yield: 8 servings
- Category: Dessert
- Method: Baking
- Cuisine: American
Description
Delight in these Cherry Pie Bombs, a fun and flaky twist on classic cherry pie. Made with buttery puff pastry filled with sweet cherry filling, these handheld treats are perfect for dessert or a sweet snack. Crispy on the outside and bursting with juicy cherries on the inside, they’re easy to prepare and bake to golden perfection.
Ingredients
Pastry
- 1 sheet puff pastry (thawed)
Filling
- 1 cup cherry filling (fresh or canned)
- 1/4 cup granulated sugar
- 2 tablespoons cornstarch
Finishing
- 1 egg (for egg wash)
- Powdered sugar (for dusting, optional)
Instructions
- Preheat and Prepare Pastry: Preheat the oven to 400°F (200°C). On a floured surface, roll out the thawed puff pastry until it is about 1/8 inch thick to create an even, thin layer for easy folding.
- Mix Cherry Filling: In a bowl, combine the cherry filling with granulated sugar and cornstarch. Stir well to ensure the mixture is evenly coated and ready to thicken during baking.
- Cut Pastry Circles: Use a round cutter or a glass to cut circles out of the rolled pastry. The size should be sufficient to hold the filling and be folded over comfortably.
- Fill and Seal: Spoon a small amount of the cherry filling mixture into the center of each pastry circle. Fold the circles in half to form half-moons and pinch the edges firmly to seal. Decorate the edges by pressing them lightly with a fork if desired.
- Bake the Pie Bombs: Place the sealed pie bombs on a parchment-lined baking sheet. Brush the tops with the beaten egg to give them a golden, shiny finish. Bake in the preheated oven for 15-20 minutes or until they turn golden brown and puffed.
- Cool and Serve: Allow the cherry pie bombs to cool slightly on a wire rack. Dust with powdered sugar if desired for an extra touch of sweetness before serving.
Notes
- Use fresh or canned cherry filling, but adjust sugar if your filling is already sweetened.
- Ensure puff pastry is fully thawed before rolling to avoid cracking.
- Sealing the edges tightly prevents filling from leaking during baking.
- Let the pie bombs cool slightly to allow filling to set and avoid burns.
- Powdered sugar dusting is optional but adds a nice presentation and sweetness.

