“`html
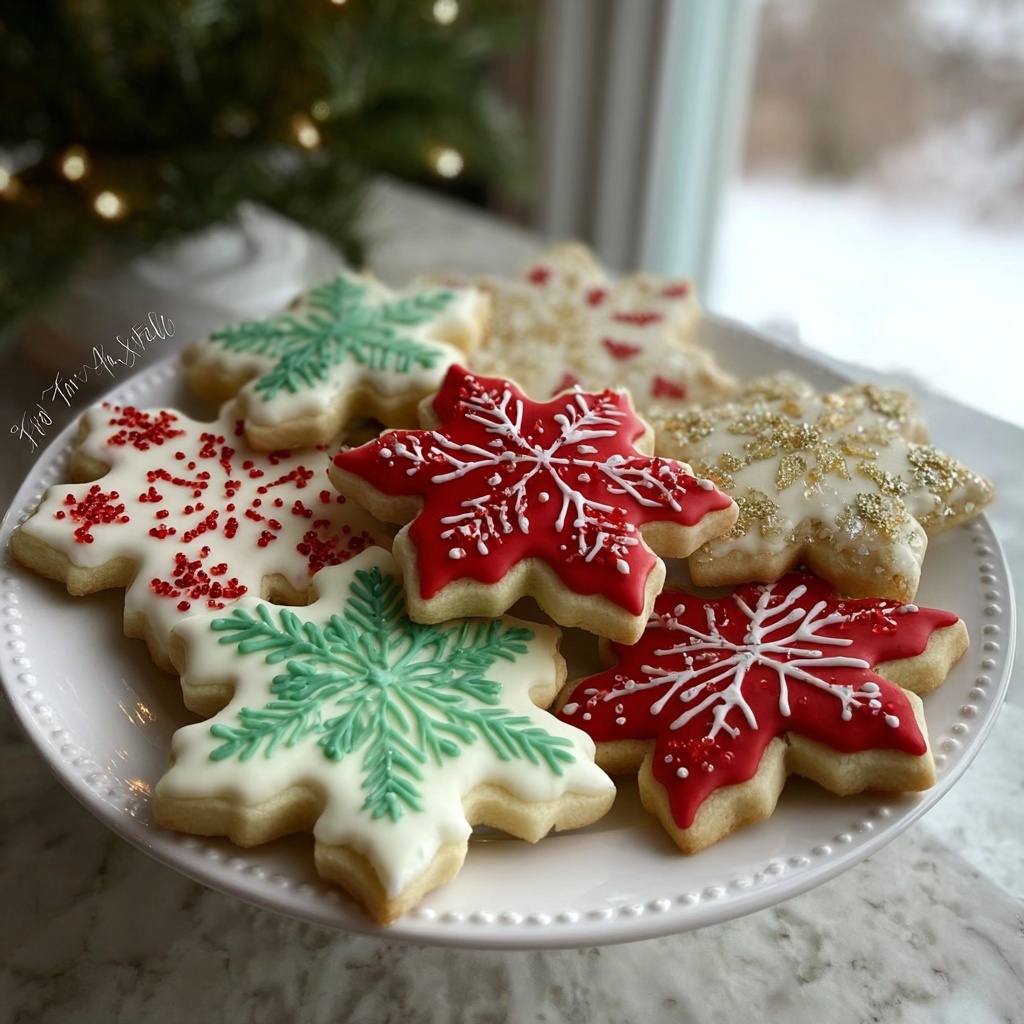
If you’re ready to fill your kitchen with the nostalgic scent of sweet vanilla and buttery goodness, you’ve got to try this Christmas Sugar Cookie Ornament Recipes Recipe. These charming sugar cookies are not only delightful to eat but also perfect for decorating and gifting during the festive season. Shaped like classic Christmas ornaments, they bring both joy and warmth to your holiday baking, making memories that will sparkle year after year.
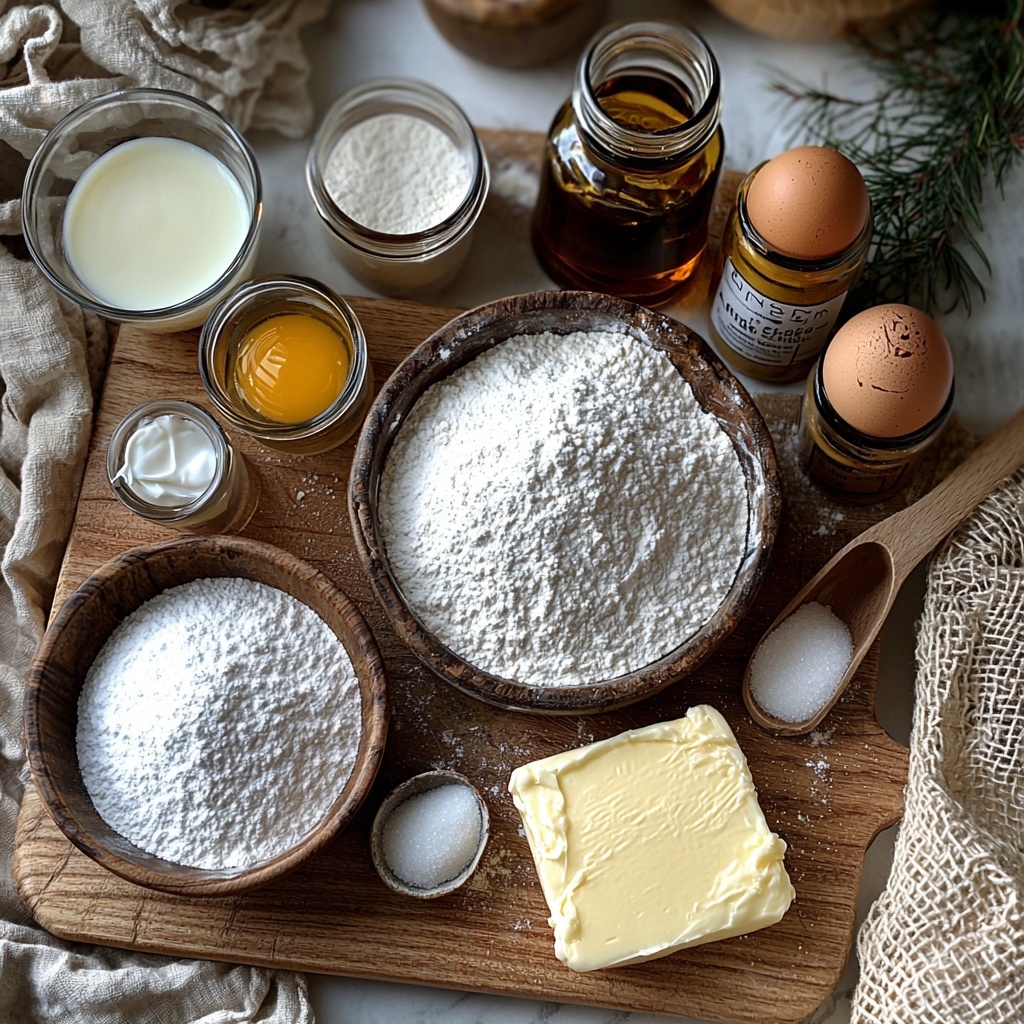
Ingredients You’ll Need
The magic of this recipe lies in its simplicity and the perfect balance of flavors and textures. Each ingredient plays a vital role—whether it’s the richness of butter, the softness from just the right amount of milk, or the delicate flavor notes from vanilla and almond extracts that make these cookies so special.
- 2 3/4 cups all-purpose flour: The sturdy base that gives your cookies that perfect soft yet sturdy texture.
- 1 teaspoon baking soda: Helps your cookies rise just enough for a light bite.
- 1/2 teaspoon baking powder: Adds a little lift and fluffiness to the dough.
- 1 cup unsalted butter, softened: Provides the creamy richness that makes these cookies melt in your mouth.
- 1 1/2 cups white sugar: Sweetens the dough while giving a slight crunch to the finished cookies.
- 1 egg: Binds the ingredients together and adds moisture for a tender crumb.
- 1 teaspoon vanilla extract: Brings warm, inviting aroma and flavor.
- 1/2 teaspoon almond extract: Offers a subtle nutty undertone that makes these cookies uniquely festive.
- 3 to 4 tablespoons milk: Adjusts dough consistency for easy rolling and cutting.
- Royal icing for decoration: The fun finishing touch that turns simple cookies into beautiful Christmas ornaments.
How to Make Christmas Sugar Cookie Ornament Recipes Recipe
Step 1: Preheat and Prep Your Ingredients
Begin by heating your oven to 375°F (190°C). This ensures it’s just right for baking your cookies evenly and creating that lightly golden edge we love. Meanwhile, gather all your ingredients to have them ready—nothing like smooth workflow in the kitchen when the holiday magic is calling.
Step 2: Combine the Dry Ingredients
In a spacious bowl, whisk together the flour, baking soda, and baking powder. This blend helps your cookies achieve their perfect texture and rise without becoming cakey, setting the stage for cookie perfection.
Step 3: Cream Butter and Sugar
Using a mixer or a sturdy spoon, cream the softened butter and sugar until the mixture is smooth and fluffy. This step is essential—it incorporates air that makes your cookies tender and gives them a pleasant crumb.
Step 4: Beat in Egg and Extracts
Add the egg along with the vanilla and almond extracts to the creamed butter and sugar. Beat these together until fully combined, so each cookie gets a uniform burst of flavor in every bite.
Step 5: Gradually Mix in Dry Ingredients
Slowly add the flour mixture to your wet mixture, combining gently to avoid overworking the dough. Overmixing can lead to tough cookies, and we want these soft and delicate, perfect for ornament shapes.
Step 6: Adjust Dough with Milk
Add 3 to 4 tablespoons of milk to the dough to get just the right consistency. It should be soft enough to roll out evenly without cracking. This little tip saves you from frustrated dough that’s too stiff or sticky.
Step 7: Roll and Cut Into Ornaments
Dust your surface lightly with flour and roll the dough out to about 1/4 inch thickness. Then, grab your favorite ornament-shaped cookie cutters to make classic holiday shapes — stars, bells, snowflakes, and more. This step is where you can get creative and make each cookie uniquely festive.
Step 8: Bake and Cool
Place your cut cookies on ungreased baking sheets and bake for 8 to 10 minutes. Keep an eye on them as they bake—once the edges turn a gentle golden, they’re ready! Let them cool completely on a wire rack so the royal icing will stick properly without melting.
Step 9: Decorate with Royal Icing
Now the fun part! Use royal icing to decorate your cookies in vibrant holiday colors and patterns. Pipe delicate snowflakes, dots, and stripes—or go wild with your personal festive flair. These decorations turn your cookies into little edible Christmas ornaments that guests will adore.
How to Serve Christmas Sugar Cookie Ornament Recipes Recipe
Garnishes
To add even more charm, sprinkle a little edible glitter or colored sugar crystals over the icing before it sets. Fresh cranberries or small holly leaves on the serving platter can also create a stunning festive display that enhances the holiday spirit alongside these delightful cookies.
Side Dishes
Serve these cookies alongside a warm cup of spiced cocoa, a frothy eggnog, or a chilled glass of milk for dipping. These drink pairings perfectly complement the sweet, delicate flavors of your sugar cookie ornaments and make for a comforting holiday treat.
Creative Ways to Present
Arrange your Christmas sugar cookie ornaments recipe cookies in a festive tin or stack them with parchment paper between layers to gift to loved ones. Another lovely idea is to hang decorated cookies individually with ribbon loops from your holiday tree, turning your baking experiments into edible decorations that everyone can admire before the big festive feast.
Make Ahead and Storage
Storing Leftovers
If you have leftovers, store your sugar cookie ornaments in an airtight container at room temperature. They’ll stay fresh and soft for 3-4 days, allowing you to enjoy that festive sweetness well after baking day.
Freezing
You can also freeze unbaked cookie dough wrapped tightly in plastic wrap and foil for up to 3 months. When ready to bake, simply thaw overnight in the fridge, then roll out, cut, and bake as usual. This way, you can spread out the holiday cheer whenever inspiration strikes.
Reheating
Leftover cookies are best enjoyed at room temperature, but if you prefer a cozy warm treat, pop them in a 300°F oven for 3-4 minutes. This subtle warm-up enhances their buttery goodness without drying them out.
FAQs
Can I substitute almond extract with something else?
Absolutely! If you don’t have almond extract, you can swap it for an equal amount of additional vanilla extract. While the flavor will change slightly, your cookies will remain delicious and fragrant.
How do I keep my cookies from spreading too much during baking?
Make sure your butter is just softened, not melted, and avoid over-mixing the dough. Chilling the dough for 30 minutes before rolling also helps maintain the shape of your ornament cookies.
What’s the best way to decorate these cookies?
Royal icing is the classic choice because it hardens beautifully, allowing you to create intricate designs. You can also use colored sugar sprinkles or edible markers for a simpler decoration style.
Can I make these cookies gluten-free?
Yes! Substitute the all-purpose flour with your favorite gluten-free flour blend that measures cup-for-cup the same. The texture may be slightly different but still delicious and festive.
How thick should I roll the dough?
Rolling the dough to about 1/4 inch thickness is ideal—it’s thick enough to hold shape and decoration but thin enough to bake through evenly and stay tender.
Final Thoughts
There’s something truly magical about baking Christmas Sugar Cookie Ornament Recipes Recipe with loved ones, creating sweet memories alongside the cookies themselves. These festive treats are effortless, charming, and perfect for adding a handmade touch to your holiday celebrations. I encourage you to give this recipe a try and enjoy the smiles that come with every bite and every decoration. Happy baking and happy holidays!
“`
Print
Christmas Sugar Cookie Ornament Recipes Recipe
- Prep Time: 15 minutes
- Cook Time: 10 minutes
- Total Time: 40 minutes
- Yield: 24 cookies
- Category: Dessert
- Method: Baking
- Cuisine: American
- Diet: Vegetarian
Description
These Christmas Sugar Cookie Ornaments are delightful festive treats perfect for holiday celebrations. Soft, buttery sugar cookies shaped into charming ornament designs, baked to perfection and decorated with royal icing for a joyful and creative baking experience.
Ingredients
Dry Ingredients
- 2 3/4 cups all-purpose flour
- 1 teaspoon baking soda
- 1/2 teaspoon baking powder
Wet Ingredients
- 1 cup unsalted butter, softened
- 1 1/2 cups white sugar
- 1 egg
- 1 teaspoon vanilla extract
- 1/2 teaspoon almond extract
- 3 to 4 tablespoons milk
For Decoration
- Royal icing
Instructions
- Preheat Oven: Preheat your oven to 375°F (190°C) to prepare for baking the cookies.
- Mix Dry Ingredients: In a medium bowl, sift together the all-purpose flour, baking soda, and baking powder to ensure even distribution of leavening agents.
- Cream Butter and Sugar: In a separate large bowl, beat the softened unsalted butter and white sugar together until the mixture becomes smooth and creamy, which will give the cookies a light texture.
- Add Egg and Extracts: Beat in the egg, vanilla extract, and almond extract into the creamed butter and sugar until fully incorporated, adding flavor and moisture to the dough.
- Combine Flour Mixture: Gradually add the dry flour mixture into the wet ingredients, mixing thoroughly to form the cookie dough but avoiding overmixing to keep the cookies tender.
- Adjust Dough Consistency: Add 3 to 4 tablespoons of milk as needed, a little at a time, to achieve the perfect dough consistency that’s pliable and easy to roll out.
- Roll and Cut Shapes: On a lightly floured surface, roll out the dough to your preferred thickness and use ornament-shaped cookie cutters to cut out festive shapes.
- Prepare Baking Sheet: Arrange the cut-out cookies on ungreased cookie sheets, giving enough space between each to allow for slight spreading during baking.
- Bake Cookies: Bake in the preheated oven for 8 to 10 minutes or until the edges are lightly golden, indicating they are perfectly baked.
- Cool Cookies: Remove the cookies from the oven and let them cool completely on wire racks to set their shape and texture before decorating.
- Decorate: Once fully cooled, decorate the cookies with royal icing in your desired patterns to create beautiful and festive ornament designs.
Notes
- Use room temperature butter for easier creaming with sugar.
- For accurate dough consistency, add milk gradually to avoid making the dough too sticky.
- If you don’t have ornament-shaped cutters, use any festive shapes or a knife to cut freeform shapes.
- Allow the cookies to cool completely before decorating to prevent icing from melting.
- Store decorated cookies in an airtight container to keep them fresh for up to one week.

