
“`html
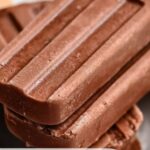
If you have a craving for something chocolatey, nostalgic, and wonderfully refreshing, you’re going to love this Creamy Homemade Fudgesicles Recipe. Imagine rich, velvety chocolate mixed with just the right balance of creaminess and sweetness, all frozen into the perfect summer treat that melts slowly in your mouth. It’s like having a little scoop of childhood joy wrapped up in a popsicle, and best of all, it’s made from simple ingredients you probably already have on hand. This recipe transforms everyday pantry staples into something magical, delivering that smooth fudgy flavor that’s far better than anything from the freezer aisle.
Ingredients You’ll Need
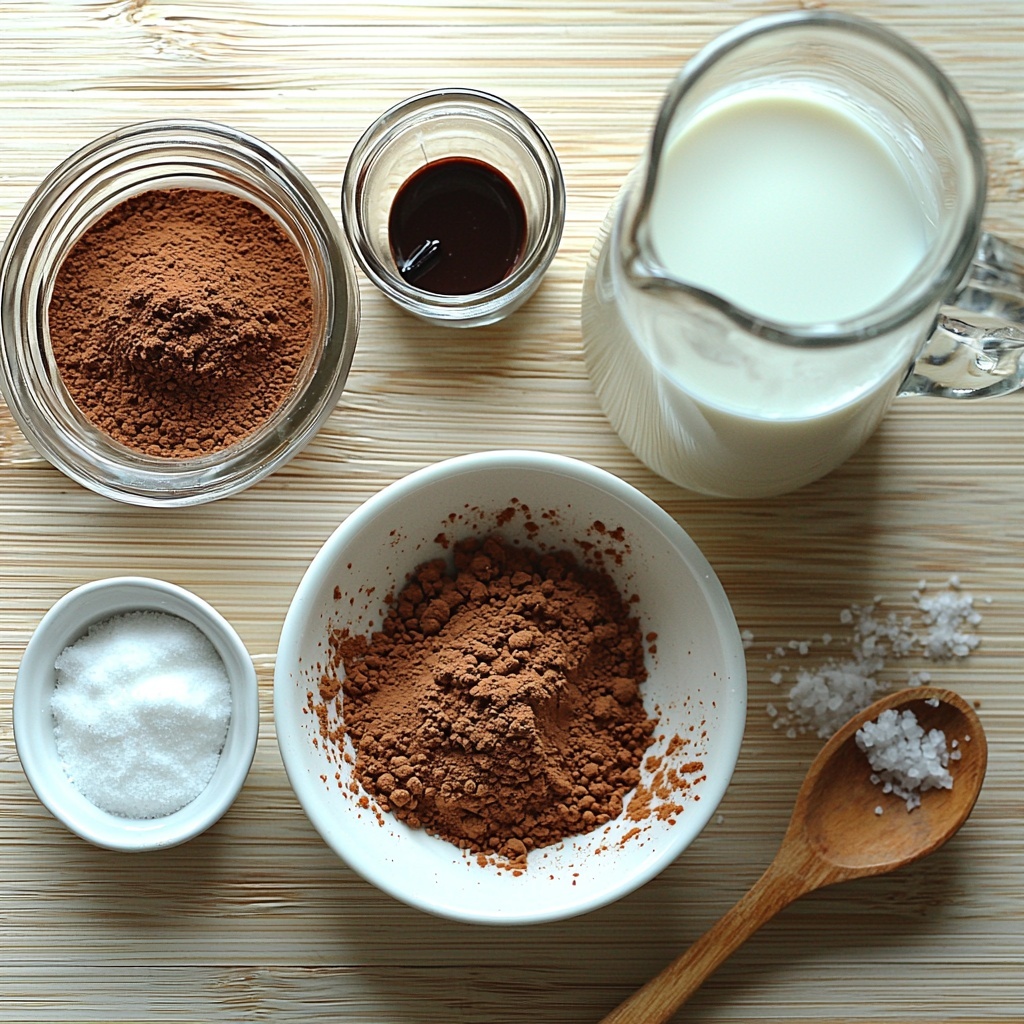
For this Creamy Homemade Fudgesicles Recipe, the ingredient list is wonderfully straightforward but carefully chosen to create an irresistible texture and deep chocolate flavor. Each component plays an essential role—from the rich creaminess of milk and heavy cream to the luscious bitterness of cocoa powder and the silky thickness brought by a touch of cornstarch.
- Milk: Adds a smooth base and balances the cream’s richness.
- Heavy cream: Brings luxurious creaminess and a luscious mouthfeel.
- Cocoa powder: Provides intense chocolate flavor without heaviness.
- Sugar: Sweetens perfectly, cutting through the cocoa’s natural bitterness.
- Cornstarch: Helps thicken the mixture for that satisfyingly smooth fudgy texture.
- Vanilla extract: Adds depth and a warm aromatic note to enhance the chocolate.
- A pinch of salt: Elevates all the flavors, perfectly balancing sweetness.
How to Make Creamy Homemade Fudgesicles Recipe
Step 1: Combine the Ingredients
Start by whisking together the milk, heavy cream, cocoa powder, sugar, and cornstarch in a medium saucepan. This initial step is crucial because it ensures all dry ingredients are evenly distributed, preventing clumps and giving your fudgesicles that beautifully smooth consistency.
Step 2: Cook Until Thickened
Heat the mixture over medium heat, stirring constantly. Patience here is key—you want to cook it gently until it thickens enough to coat the back of a spoon. This gradual thickening is what sets the creamy stage for your fudgesicles, making every bite silky without being icy or grainy.
Step 3: Add Vanilla and Salt
Once off the heat, stir in the vanilla extract and a pinch of salt. These small additions bring the whole mixture to life by enhancing the chocolate’s natural complexity and balancing the sweetness.
Step 4: Cool the Mixture Slightly
Allow your chocolatey base to cool for a bit before pouring it into molds. This step helps prevent ice crystals from forming and ensures that your fudgesicles freeze with that perfect creamy texture instead of turning icy.
Step 5: Pour into Molds and Freeze
Pour the cooled mixture evenly into popsicle molds and pop them into the freezer. For best results, freeze for several hours or until completely solid. This waiting builds anticipation but believe me, it’s worth every minute!
How to Serve Creamy Homemade Fudgesicles Recipe
Garnishes
While these fudgesicles are delicious on their own, adding a sprinkle of crushed nuts, a drizzle of melted chocolate, or a dusting of sea salt right before serving can elevate them to dessert star status. The crunch, extra chocolate, or salty contrast creates a delightful play of flavors and textures.
Side Dishes
If you’re serving these at a gathering, pair them with fresh berries or a handful of sliced bananas to add bright, fresh notes that complement the fudgy richness. Alternatively, a scoop of vanilla ice cream alongside creates a chilly, creamy chocolate lover’s dream duo.
Creative Ways to Present
Try making mini fudgesicles in silicone molds for bite-sized indulgences or layer the mixture with crushed cookies for a fun fudge popsicle twist. Wrapping them with a festive ribbon when gifting or adding popsicle sticks with fun shapes also makes the presentation extra special.
Make Ahead and Storage
Storing Leftovers
If you manage to save some fudgesicles, store them in an airtight container or wrapped tightly in plastic wrap in the freezer. They will maintain their smooth texture and delicious flavor for up to 3-4 days, making them a perfect make-ahead treat for warm days ahead.
Freezing
The real beauty of this Creamy Homemade Fudgesicles Recipe is how well it freezes. The rich cream and cornstarch combination prevents ice crystals from forming, ensuring every fudgesicle stays silky smooth. Just keep them in the freezer until solid and enjoy chilled anytime you want a cool chocolate delight.
Reheating
Since these fudgesicles are best enjoyed frozen, reheating isn’t necessary or recommended. If they soften before you want to eat them, simply pop them back into the freezer for a bit, and they’ll firm right back up—ready to satisfy your chocolate cravings.
FAQs
Can I use a dairy-free milk substitute in this recipe?
Yes! You can substitute the milk and cream with full-fat coconut milk or almond milk for a dairy-free version. Keep in mind that the texture may be slightly different but still deliciously creamy.
What type of cocoa powder works best?
Natural unsweetened cocoa powder works wonderfully here, delivering that deep chocolate flavor. Avoid Dutch-processed cocoa if you want the classic fudgy taste, although it’s fine if that’s what you have.
How long does it take to freeze the fudgesicles completely?
It usually takes several hours to freeze solid—ideally at least 4-6 hours or overnight for the best texture, ensuring they hold together perfectly when you bite in.
Can I make these without cornstarch?
The cornstarch helps achieve that creamy, thickened texture you want in fudgesicles. Without it, they might be runnier and icier, so it’s best to keep it if possible.
Is it possible to add mix-ins like nuts or chocolate chips?
Absolutely! Stir in finely chopped nuts or mini chocolate chips into the cooled mixture before freezing for extra texture and bites of surprise chocolate or crunch in every fudgesicle.
Final Thoughts
There’s something truly special about homemade treats, and this Creamy Homemade Fudgesicles Recipe is no exception. It’s simple to make, utterly delicious, and sure to bring smiles on a hot day or whenever you need a chocolate fix. So grab your ingredients, stir up this magical mix, and enjoy the feeling of pure, creamy chocolate bliss in every bite. Trust me—you’ll want to make these again and again!
“`
Print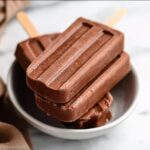
Creamy Homemade Fudgesicles Recipe
- Prep Time: 10 minutes
- Cook Time: 7 minutes
- Total Time: 6 hours 17 minutes
- Yield: 8 fudgesicles
- Category: Dessert
- Method: Stovetop
- Cuisine: American
Description
These creamy homemade fudgesicles combine rich cocoa, smooth cream, and a touch of vanilla to create an indulgent frozen treat. Made from scratch, they offer a velvety texture and intense chocolate flavor, perfect for cooling off on a hot day or satisfying your sweet tooth with a healthier alternative to store-bought options.
Ingredients
Fudgesicle Mixture
- 2 cups whole milk
- 1 cup heavy cream
- 1/2 cup unsweetened cocoa powder
- 1/2 cup granulated sugar
- 2 tablespoons cornstarch
- 1 teaspoon vanilla extract
- Pinch of salt
Instructions
- Combine ingredients: In a medium saucepan, whisk together the whole milk, heavy cream, cocoa powder, sugar, and cornstarch until smooth and well combined.
- Cook and thicken: Place the saucepan over medium heat and cook the mixture, stirring constantly to prevent lumps or burning, until it thickens to a creamy consistency—this usually takes about 5 to 7 minutes.
- Add flavorings: Remove the saucepan from the heat. Stir in the vanilla extract and a pinch of salt to enhance the chocolate flavor.
- Cool the mixture: Allow the fudgesicle mixture to cool slightly at room temperature, ensuring it is not hot before pouring into molds.
- Fill molds: Pour the slightly cooled mixture evenly into popsicle molds, leaving a little space at the top for expansion.
- Freeze solid: Place the molds in the freezer and freeze for at least 4 to 6 hours, or until the fudgesicles are fully set and solid.
Notes
- Use whole milk and heavy cream to achieve the creamiest texture.
- Constant stirring during cooking prevents lumps and burning.
- You can substitute cornstarch with arrowroot powder if preferred.
- For dairy-free versions, use coconut milk and non-dairy cream alternatives.
- Let the fudgesicles sit at room temperature for a few minutes before unmolding for easier removal.
- Add chopped nuts or chocolate chips to the mixture before freezing for texture variations.

