
If you love pumpkin pie but want to skip the fuss of making a crust, you are going to fall head over heels for this Crustless Pumpkin Pie Insanely Good No Crust Needed Recipe. It’s an incredibly smooth, richly spiced custard that captures all the cozy flavors of traditional pumpkin pie with a creamy texture that’s just downright addictive. Perfectly simple, yet seriously impressive, this pie is a brilliant way to enjoy a seasonal classic without any crust crunch, making it an ideal dessert for busy weeknights or festive occasions alike.
Ingredients You’ll Need
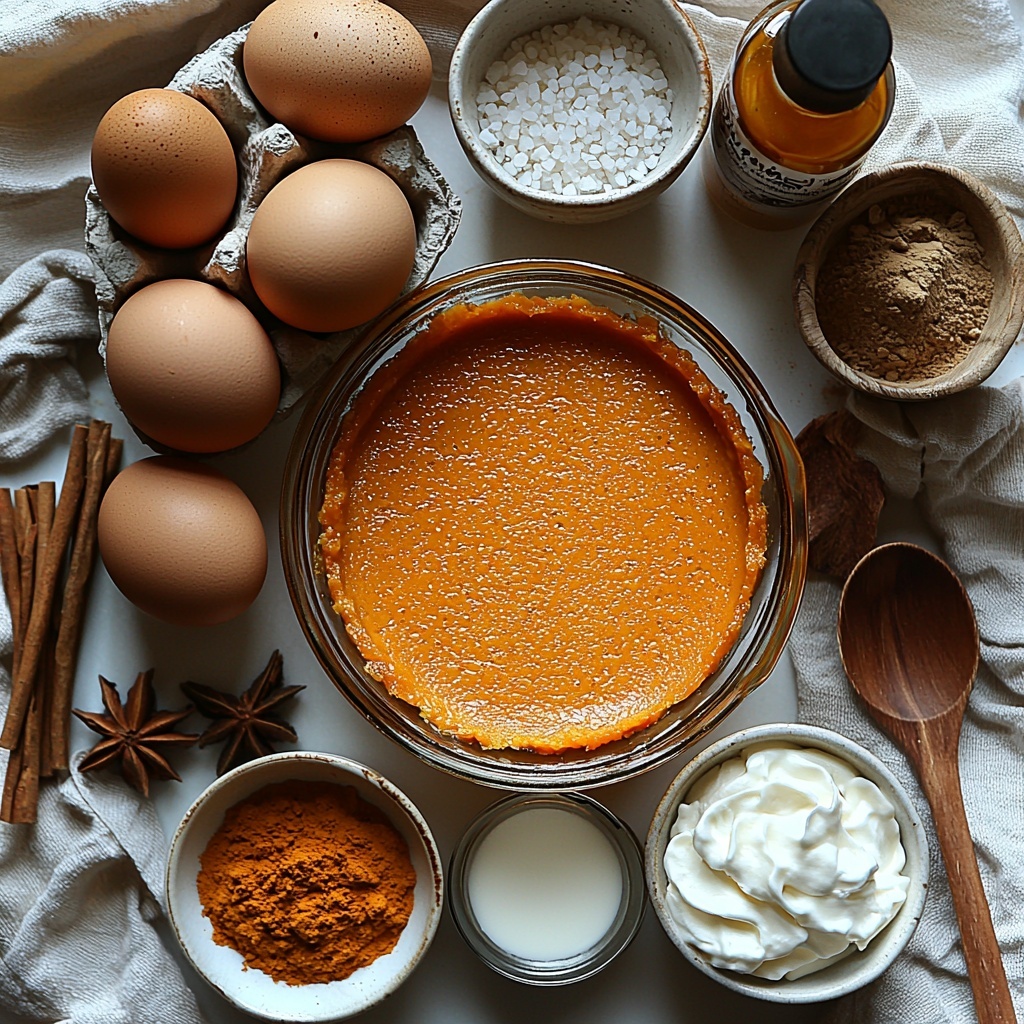
The beauty of this recipe is in its simple, straightforward ingredients—each one plays a crucial role in creating that luscious texture, warm flavor, and inviting hue. Let’s get to the essentials you’ll love for this Crustless Pumpkin Pie Insanely Good No Crust Needed Recipe.
- Pumpkin puree (1 can, 15 oz/425 g): Use pure pumpkin puree, not the spiced canned pumpkin pie filling, for perfect flavor control and texture.
- Large eggs (3, room temperature): Eggs are the backbone of the custard, providing structure and silkiness.
- Evaporated milk or half-and-half (1 cup): Evaporated milk gives the pie its classic, smooth consistency, while half-and-half ups the richness.
- Unsalted butter (2 tablespoons, melted and cooled): This is optional but adds an extra layer of silkiness to the filling that’s hard to resist.
- Pure vanilla extract (2 teaspoons): Vanilla deepens the overall flavor and rounds out the spices beautifully.
- Light brown sugar (¾ cup, packed): Adds caramel notes and moistness—essential for that irresistibly cozy taste.
- Granulated sugar (¼ cup): Balances the brown sugar to keep the sweetness just right without overpowering.
- Pumpkin pie spice (2½ teaspoons) or blend of cinnamon, ginger, nutmeg, and cloves: This warm spice mix is the aromatic soul of the pie, bringing a fragrant fall magic to every bite.
- Fine sea salt (¼ teaspoon): Enhances all the flavors and prevents the pie from tasting flat.
- Gluten-free baking spray or butter (for greasing): Makes sure your crustless masterpiece pops out cleanly and keeps it friendly for gluten-free diets.
- Lightly sweetened whipped cream and extra cinnamon or nutmeg (for dusting): Perfect finishing touches when serving to elevate the experience.
How to Make Crustless Pumpkin Pie Insanely Good No Crust Needed Recipe
Step 1: Prep Your Pan and Oven
Start by preheating your oven to 350°F (175°C). Lightly grease a 9-inch pie dish with butter or use gluten-free baking spray. This small prep step is crucial—it ensures your pie releases perfectly after baking without sticking to the pan. It’s a simple way to keep your Crustless Pumpkin Pie Insanely Good No Crust Needed Recipe looking its best.
Step 2: Whisk the Wet Ingredients
Grab a large mixing bowl and combine your pumpkin puree, eggs, evaporated milk (or half-and-half), melted butter, and vanilla extract. Whisk them vigorously until the mixture is smooth and creamy. Taking a moment here to thoroughly incorporate these ingredients means you’re setting up a silky, luscious filling that melts in your mouth.
Step 3: Add Sugars and Spices
Next, whisk in the light brown sugar, granulated sugar, pumpkin pie spice blend, and sea salt. Keep mixing until all the sugar granules and spices dissolve evenly into your pumpkin base. This step is where the authentic, rich fall flavors infuse every bite of your Crustless Pumpkin Pie Insanely Good No Crust Needed Recipe—don’t rush it.
Step 4: Fill the Dish and Bake
Pour the filling smoothly into your prepared pie dish. If there are any bubbles on the surface, gently tap the dish on your counter a couple of times to bring them to the top — this helps the pie bake evenly and look beautiful. Pop your pie into the oven on the middle rack and bake for about 45 to 55 minutes. You’ll know it’s done when the edges are puffed and set but the center still has a slight jiggle, reminiscent of soft custard.
Step 5: Cool and Chill Before Slicing
Once baked, transfer your pie to a cooling rack and allow it to reach room temperature. This helps the filling to settle beautifully. Then, refrigerate for at least 2 to 4 hours until the custard is completely set. This chilling time is crucial for getting those clean, picture-perfect slices we all love in a great Crustless Pumpkin Pie Insanely Good No Crust Needed Recipe.
How to Serve Crustless Pumpkin Pie Insanely Good No Crust Needed Recipe
Garnishes
A swirl of lightly sweetened whipped cream is the perfect complement, adding airy richness without overshadowing the pie’s cozy flavors. For a little extra flair, sprinkle a dash of cinnamon or nutmeg on top—this simple dusting brings a festive aroma and inviting look that says fall at first glance.
Side Dishes
This crustless pumpkin pie pairs beautifully with warm coffee or spiced chai for a comforting autumn afternoon treat. Serve alongside a scoop of vanilla ice cream for an indulgent dessert, or enjoy with fresh fruit to balance its rich texture with bright freshness.
Creative Ways to Present
Want to impress guests? Serve individual portions of this Crustless Pumpkin Pie Insanely Good No Crust Needed Recipe in petite ramekins topped with a drizzle of caramel sauce and candied pecans. Or for a casual vibe, layer chunks of pie in clear glasses with whipped cream and crushed gingersnaps to create a festive parfait everyone will rave about.
Make Ahead and Storage
Storing Leftovers
Leftover pie should be covered tightly with plastic wrap or stored in an airtight container in the refrigerator. It will keep well for 3 to 4 days, maintaining its velvety texture and vibrant flavor as you savor every last bite.
Freezing
If you want to make this pie ahead for holiday celebrations, freezing works like a charm. Wrap the fully cooled pie tightly in plastic wrap, then in foil, and freeze for up to 2 months. Thaw overnight in the refrigerator before serving to preserve that classic creamy consistency.
Reheating
When you’re ready to enjoy leftovers warm, gently reheat slices in a low oven (around 300°F / 150°C) for about 10 to 15 minutes. Avoid the microwave if possible; slow warming keeps the custard smooth and prevents it from becoming watery.
FAQs
Can I use canned pumpkin pie filling instead of pumpkin puree?
It’s best to stick with pure pumpkin puree because the canned pie filling already has added spices and sugars, which can throw off the balance of flavors and sweetness in this recipe.
Is this recipe gluten-free?
Absolutely! Since it requires no crust, it’s naturally gluten-free—just be sure to use gluten-free baking spray or butter for greasing the dish to keep it safe for gluten-sensitive eaters.
How do I know when the pie is done baking?
The edges of your pie should be set and puffed, but the center should still have a gentle jiggle. Inserting a knife or toothpick near the edge should come out mostly clean, with just a tiny bit of moist custard clinging to it.
Can I make this pie vegan or dairy-free?
This recipe relies on eggs and dairy for its custardy texture, so substituting those is tricky. However, there are vegan custard alternatives to explore, but results may vary from this classic Crustless Pumpkin Pie Insanely Good No Crust Needed Recipe.
What’s the best way to serve this pie?
Serving chilled with a dollop of lightly sweetened whipped cream and a sprinkle of cinnamon or nutmeg is my favorite. It enhances the warm spices and lends the comforting touch we look for in fall desserts.
Final Thoughts
There’s something truly magical about this Crustless Pumpkin Pie Insanely Good No Crust Needed Recipe—it’s like the cozy warmth of pumpkin pie without any of the crust fuss. Whether you’re baking for family, friends, or just treating yourself, this pie offers a luscious, smooth, and spiced delight that’s bound to become a new favorite. Give it a try, and watch it disappear slice by slice!
Print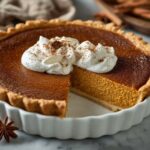
Delicious Recipe
- Prep Time: 15 minutes
- Cook Time: 50 minutes
- Total Time: 1 hour 5 minutes
- Yield: 8 servings
- Category: Dessert
- Method: Baking
- Cuisine: American
- Diet: Gluten Free
Description
This crustless pumpkin pie is an insanely good, easy-to-make dessert that requires no crust, making it gluten-free and mess-free. It combines smooth pumpkin puree with warm spices and a creamy custard base, baked to silky perfection. Perfect for fall gatherings or any time you crave a comforting, classic pumpkin pie flavor without the fuss of a crust.
Ingredients
For the Pie Filling
- 1 can (15 oz / 425 g) pure pumpkin puree (not canned pumpkin pie filling)
- 3 large eggs (at room temperature)
- 1 cup evaporated milk or half-and-half
- 2 tablespoons unsalted butter (melted and slightly cooled, optional for extra silkiness)
- 2 teaspoons pure vanilla extract
- ¾ cup packed light brown sugar
- ¼ cup granulated sugar
- 2½ teaspoons pumpkin pie spice or:
- 2 teaspoons ground cinnamon
- ½ teaspoon ground ginger
- ¼ teaspoon ground nutmeg
- Pinch of cloves or allspice
- ¼ teaspoon fine sea salt
For Preparation
- Gluten-free baking spray or a thin layer of butter for the pie dish
For Serving
- Lightly sweetened whipped cream
- Extra ground cinnamon or nutmeg for dusting
Instructions
- Prepare the pan and oven: Preheat your oven to 350°F (175°C). Lightly grease a 9-inch pie dish with butter or spray it with gluten-free baking spray to ensure the custard releases cleanly when baked.
- Whisk the wet ingredients: In a large mixing bowl, combine the pumpkin puree, eggs, evaporated milk (or half-and-half), melted butter, and vanilla extract. Whisk thoroughly until the mixture is smooth and creamy, ensuring a silky base for your pie.
- Add sugars and spices: Gradually whisk in the light brown sugar, granulated sugar, pumpkin pie spice (or your homemade spice blend), and sea salt. Continue whisking until no streaks of sugar or spices remain, which guarantees even flavor throughout the pie.
- Fill the pie dish and bake: Pour the filling into the prepared pie dish. If bubbles appear on the surface, gently tap the dish on the counter to remove them. Place the pie in the center rack of the oven and bake for 45 to 55 minutes. The edges should be puffed and set, while the center should have a slight jiggle like soft custard. Test doneness by inserting a thin knife or toothpick about 2 inches from the edge; it should come out mostly clean with just a bit of moisture, not wet batter.
- Cool and chill before slicing: Transfer the pie to a cooling rack and allow it to cool to room temperature. Then refrigerate for at least 2 to 4 hours until fully set. This cooling step firms the custard for clean slicing and smooth texture.
- Serve: Slice the chilled crustless pumpkin pie and garnish with a swirl of lightly sweetened whipped cream and a dusting of extra ground cinnamon or nutmeg. Enjoy a rich, classic pumpkin pie flavor without any crust.
Notes
- Use pure pumpkin puree, not canned pumpkin pie filling, for the best texture and flavor.
- Evaporated milk creates a traditional custard texture, while half-and-half makes the pie richer.
- Optional melted butter adds extra silkiness to the filling.
- Using a gluten-free baking spray or butter helps prevent sticking and makes this recipe gluten-free.
- Allow the pie to chill thoroughly before slicing to ensure clean, neat pieces.
- This recipe serves 8 and is perfect for those avoiding gluten or looking for a lower-fat pumpkin pie alternative without crust.
- Adjust spices to taste, especially if using the individual spice blend.

