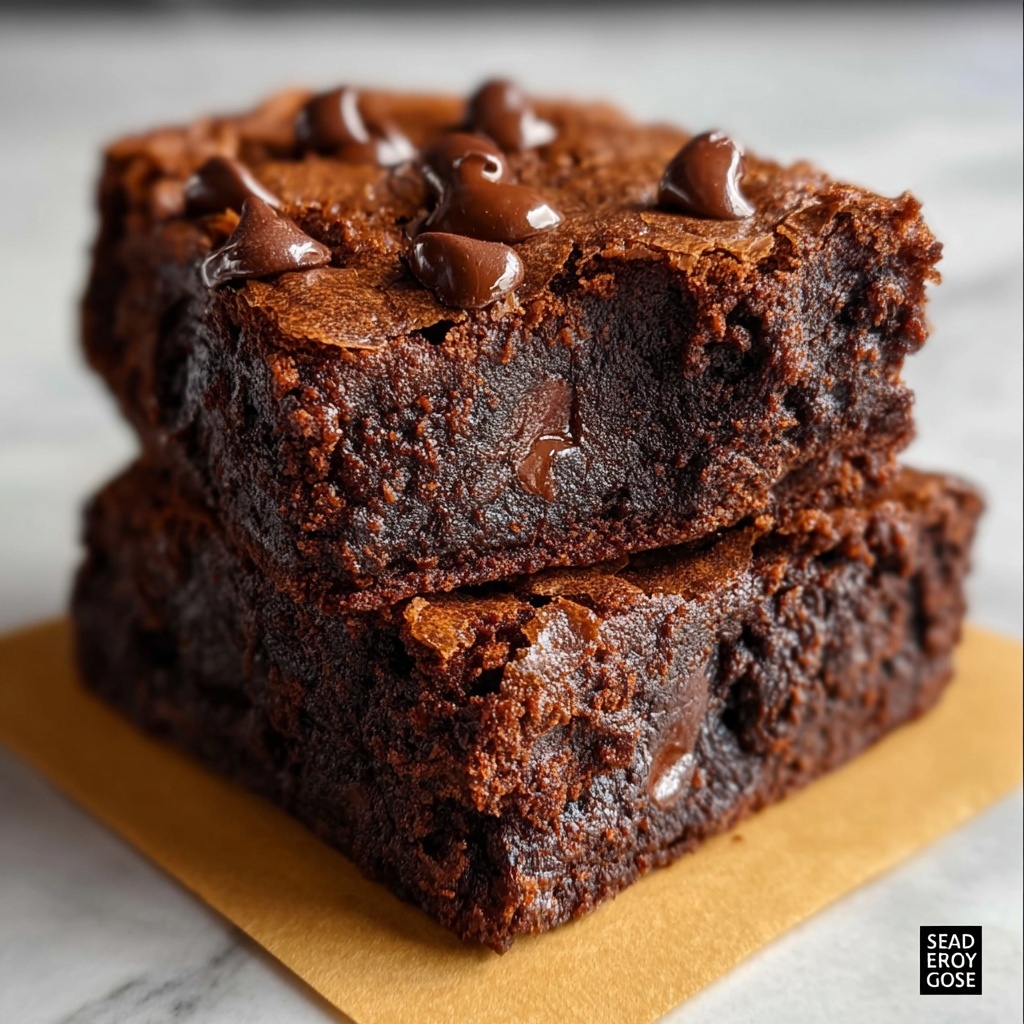
If you’ve ever dreamed of enjoying a rich, fudgy brownie without the heaviness that usually comes with traditional recipes, you are going to absolutely adore this Greek Yogurt Brownies Recipe. It’s a game-changer that combines the indulgence of chocolatey goodness with the creamy tang of Greek yogurt, resulting in brownies that are moist, tender, and packed with flavor. Plus, Greek yogurt adds a subtle protein boost and helps keep the texture perfectly soft and luscious, making these brownies both wholesome and utterly satisfying. Once you try this recipe, it might just become your new favorite way to enjoy brownies without any guilt.

Ingredients You’ll Need
These ingredients are straightforward but essential for creating the perfect balance of taste, texture, and color in this Greek Yogurt Brownies Recipe. Each one plays a key role, from the creamy tang of Greek yogurt to the rich depth of cocoa powder, ensuring every bite is pure bliss.
- ¾ cup plain Greek yogurt (2% or full fat): Provides moisture, tenderness, and a slight tang that balances the sweetness beautifully.
- 2 large eggs: Bind the ingredients together and add richness to the batter.
- ⅓ cup maple syrup: Adds natural sweetness with a hint of caramel flavor, enhancing the brownies’ depth.
- 1 teaspoon vanilla extract: Brings warmth and enhances the chocolate flavor.
- ½ cup unsweetened cocoa powder (Dutch-processed preferred): Delivers that deep chocolate color and intense, fudgy flavor.
- ½ cup almond flour or oat flour: Adds structure and a subtle nutty note, while keeping the brownies light and soft.
- ¼ teaspoon salt: Balances sweetness and intensifies chocolate flavors for that perfect taste profile.
- ¼ cup dark chocolate chips (optional): For an extra melty, gooey surprise in every bite.
- ¼ cup chopped nuts (optional): Adds delightful crunch and texture contrast.
How to Make Greek Yogurt Brownies Recipe
Step 1: Preheat and Prepare Your Pan
Start by setting your oven to 350°F and lining an 8×8-inch baking pan with parchment paper. This step is simple but crucial because it ensures the brownies bake evenly and come out cleanly without sticking to the pan.
Step 2: Whisk the Wet Ingredients
Grab a medium mixing bowl and whisk together the plain Greek yogurt, eggs, maple syrup, and vanilla extract until the mixture is smooth and well combined. This blend forms the creamy, tender base of your brownies, so it’s important for it to be well-mixed but don’t worry about making it overly frothy.
Step 3: Mix the Dry Ingredients
In a separate bowl, sift or whisk together the unsweetened cocoa powder, almond or oat flour, and salt. Combining these dry ingredients separately helps distribute everything evenly later on, avoiding lumps and ensuring consistent chocolate flavor throughout your batter.
Step 4: Fold Dry Ingredients into the Wet
Gently fold the dry ingredients into the wet mixture using a spatula. Remember to mix just until combined—overmixing can result in a tougher brownie texture, and we want these to be wonderfully soft and fudgy. The batter should look glossy and rich.
Step 5: Add Chocolate Chips and Nuts (Optional)
If you’re feeling a little adventurous or love textural surprises, stir in the dark chocolate chips and chopped nuts. These extras elevate the brownies, creating little bursts of flavor and crunch in every bite.
Step 6: Pour and Smooth the Batter
Pour your velvety batter into the prepared pan and smooth the surface with a spatula. Making the surface even helps the brownies bake uniformly so that no spot ends up dry or undercooked.
Step 7: Bake to Perfection
Bake the brownies for 20 to 25 minutes. You’re aiming for a center that is just set—when a toothpick inserted into the middle comes out with a few moist crumbs, the brownies are perfectly fudgy and ready to come out of the oven.
Step 8: Cool Completely
Place the pan on a wire rack and let the brownies cool completely. Cooling is key because it allows the fudgy texture to set properly and makes slicing easier without crumbling.
Step 9: Chill Before Serving
Pop the pan into the refrigerator for at least one hour before cutting into 12 squares. Chilling not only improves the texture but enhances the flavor so each bite is irresistibly satisfying.
How to Serve Greek Yogurt Brownies Recipe
Garnishes
While these brownies are delectable on their own, adding a light dusting of powdered sugar, a drizzle of melted dark chocolate, or a sprinkle of crushed nuts on top can elevate their presentation and add a touch of elegance. Fresh berries or a dollop of whipped cream also complement the tanginess from the Greek yogurt.
Side Dishes
Pair your Greek Yogurt Brownies Recipe with a scoop of vanilla ice cream or a refreshing bowl of mixed berries for a delightful contrast of temperatures and flavors. A cup of strong coffee or a creamy latte makes an excellent beverage companion, balancing the richness perfectly.
Creative Ways to Present
For a fun twist, serve the brownies as mini parfait layers with Greek yogurt and fresh fruit in clear glasses to showcase their luscious textures. You could also cut them into bite-sized pieces and serve as part of a dessert platter with nuts, dried fruits, and gourmet chocolates for a party-ready treat.
Make Ahead and Storage
Storing Leftovers
Store leftover brownies in an airtight container in the refrigerator to keep them moist and fresh for up to 4 days. Keeping them cool helps retain their fudgy texture while preventing them from drying out.
Freezing
If you want to keep your brownies longer, wrap them tightly in plastic wrap and then foil, or place in an airtight freezer-safe container. They freeze wonderfully and can be stored for up to 3 months without losing their delectable flavor or moist texture.
Reheating
To enjoy brownies fresh from the fridge or freezer, gently warm them in a microwave-safe dish for 15 to 20 seconds or until just soft. Avoid overheating to preserve the perfect fudgy consistency and prevent them from drying out.
FAQs
Can I use non-dairy yogurt instead of Greek yogurt in this recipe?
While Greek yogurt contributes to the texture and flavor uniquely, you can substitute non-dairy yogurt like coconut or almond yogurt in this recipe. Just make sure it’s thick and creamy to maintain the right consistency, though the flavor might be slightly different.
Is this Greek Yogurt Brownies Recipe gluten-free?
Yes! By using almond flour or oat flour, both naturally gluten-free options, this recipe can easily be made gluten-free. Just ensure your oats are certified gluten-free if you choose oat flour.
Why do the brownies need to be refrigerated before slicing?
Refrigerating the brownies helps set the texture, making them easier to cut into clean squares without crumbling. It also deepens the flavor, enhancing the brownie’s fudgy richness.
Can I make these brownies vegan?
This particular recipe relies on eggs to bind ingredients, and Greek yogurt for moisture, so it’s not vegan as is. However, you might experiment with vegan yogurt and egg substitutes, but the texture could vary.
What does the Greek yogurt add to the brownies?
Greek yogurt adds moisture, tenderness, and a slight tang, which balances the sweetness and enriches the overall chocolate flavor, making these brownies uniquely soft and flavorful compared to traditional recipes.
Final Thoughts
This Greek Yogurt Brownies Recipe is a delightful way to enjoy a classic treat with a nourishing twist. Its moist, fudgy texture combined with the vibrant flavor that Greek yogurt brings creates a dessert that’s simply unforgettable. Whether you’re baking for family, friends, or just treating yourself, these brownies will quickly become a beloved staple in your baking repertoire. Give them a try and watch everyone come back for seconds with a big smile!
Print
Greek Yogurt Brownies Recipe
- Prep Time: 15 minutes
- Cook Time: 25 minutes
- Total Time: 40 minutes plus 1 hour chilling
- Yield: 12 brownies (12 squares)
- Category: Dessert
- Method: Baking
- Cuisine: American
- Diet: Gluten Free
Description
These Greek Yogurt Brownies offer a moist, fudgy texture with the added protein boost from Greek yogurt, making them a healthier twist on a classic treat. Sweetened naturally with maple syrup and made with almond or oat flour, these brownies are gluten-free friendly and optionally packed with dark chocolate chips and nuts for extra indulgence.
Ingredients
Main Ingredients
- ¾ cup plain Greek yogurt (2% or full fat)
- 2 large eggs
- ⅓ cup maple syrup
- 1 teaspoon vanilla extract
- ½ cup unsweetened cocoa powder (Dutch-processed preferred)
- ½ cup almond flour or oat flour
- ¼ teaspoon salt
Optional Toppings
- ¼ cup dark chocolate chips
- ¼ cup chopped nuts
Instructions
- Preheat Oven: Preheat your oven to 350°F (175°C) and line an 8×8-inch baking pan with parchment paper to ensure your brownies release easily after baking.
- Mix Wet Ingredients: In a medium mixing bowl, whisk together the Greek yogurt, eggs, maple syrup, and vanilla extract until the mixture is smooth and well combined.
- Combine Dry Ingredients: In a separate bowl, mix the unsweetened cocoa powder, almond or oat flour, and salt thoroughly to evenly distribute the dry components.
- Fold Ingredients Together: Gently fold the dry ingredient mixture into the wet ingredients just until combined, taking care not to overmix which can affect texture.
- Add Optional Mix-ins: Stir in dark chocolate chips and chopped nuts if you choose to include them, adding extra flavor and texture to the brownies.
- Prepare for Baking: Pour the batter into the prepared pan and use a spatula to smooth out the top evenly.
- Bake: Bake the brownies in the preheated oven for 20-25 minutes, until the center is just set and a toothpick inserted comes out with a few moist crumbs.
- Cool: Remove the pan from the oven and place it on a wire rack to cool completely, allowing the brownies to set properly.
- Chill and Serve: Refrigerate the cooled brownies for at least 1 hour before slicing into 12 squares to achieve the best texture and flavor.
Notes
- Use parchment paper to prevent sticking and make removal easier.
- Do not overmix the batter to keep the brownies tender and fudgy.
- Refrigerating helps the brownies firm up for cleaner slicing.
- Choose almond flour for a nuttier flavor or oat flour for a slightly lighter bite.
- Adjust maple syrup quantity if you prefer less sweetness.
- For a dairy-free version, substitute Greek yogurt with a thick plant-based yogurt.


