
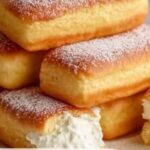
If you’ve ever longed for that nostalgic, golden sponge cake with a luscious creamy center but wanted to skip the preservatives and mystery ingredients, I’m thrilled to share my Homemade Twinkies Recipe with you. This delightful treat combines a light, fluffy cake with the sweetest cream filling, made from scratch in your own kitchen. It’s simple, soothing, and guaranteed to bring back childhood memories or create brand-new ones with family and friends.
Ingredients You’ll Need
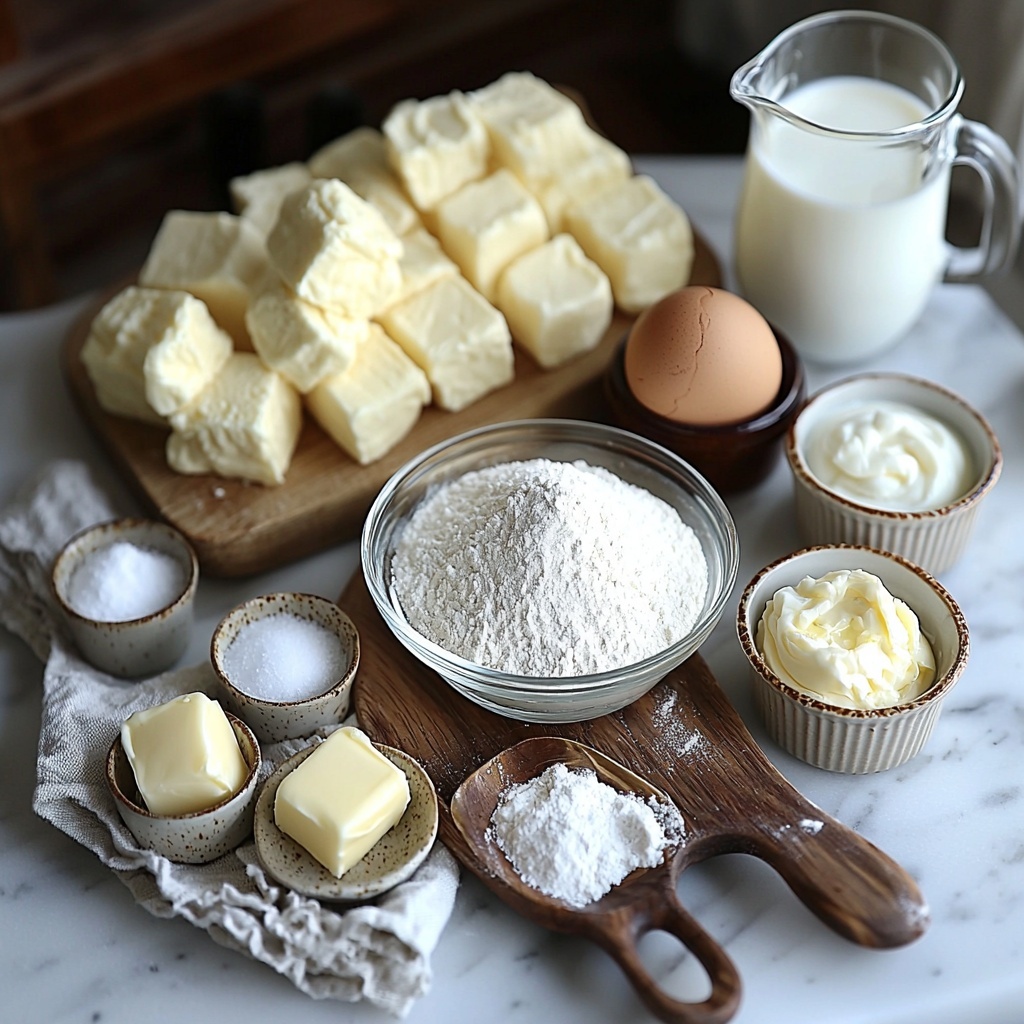
To whip up your own Homemade Twinkies Recipe, you only need a handful of everyday ingredients, each playing a crucial role in creating that perfect texture and flavor contrast between cake and cream.
- 1 cup all-purpose flour: The base that gives the cake its soft and tender crumb.
- 1 teaspoon baking powder: Helps the cake rise beautifully, making it light and airy.
- 1/2 teaspoon baking soda: Works with the other leavening agents to ensure a gentle lift.
- 1/4 teaspoon salt: Balances the sweetness and enhances all the other flavors.
- 1/2 cup unsalted butter, softened: Adds richness and moisture for that melt-in-your-mouth feel.
- 1 cup granulated sugar: Sweetens the cake and helps create a tender crumb.
- 2 large eggs: Bind everything together and add to the cake’s structure and fluffiness.
- 1 teaspoon vanilla extract: Infuses warmth and that classic vanilla aroma we all love in Twinkies.
- 1/2 cup milk: Keeps the batter smooth and moist, balancing the dry ingredients.
- Cream filling ingredients: Powdered sugar, butter, vanilla extract, and milk combine to form a silky, sweet center.
How to Make Homemade Twinkies Recipe
Step 1: Preheat and prepare your pans
Start by heating your oven to 350°F (175°C). Greasing your Twinkie molds or cupcake pans beforehand is key to ensuring your little golden cakes pop out effortlessly after baking.
Step 2: Mix your dry ingredients
In a medium bowl, whisk together the all-purpose flour, baking powder, baking soda, and salt. Combining these first gives you an even distribution of leavening agents so your cakes rise uniformly.
Step 3: Cream the butter and sugar
In a separate large bowl, beat the unsalted butter and granulated sugar together until the mixture turns light and fluffy—this usually takes about 3 minutes. This step is crucial as it incorporates air, creating that soft sponge texture.
Step 4: Add eggs and vanilla
Beat in the eggs one at a time, making sure each is fully incorporated before adding the next. Then stir in the vanilla extract, giving your batter that unmistakable warm vanilla flavor.
Step 5: Combine dry ingredients and milk alternately
Gradually add the dry flour mixture to your wet ingredients, alternating with the milk. Begin and end with the dry ingredients. Mix gently until just combined—overmixing can toughen the batter, and we want fluffiness!
Step 6: Fill the pans and bake
Spoon the batter into your prepared molds or pans, filling each about two-thirds full to leave room for rising. Bake for 20 to 25 minutes or until the cakes are a beautiful golden brown and a toothpick inserted in the center comes out clean.
Step 7: Cool and fill with cream
Allow your cakes to cool completely before piping in the luscious cream filling. This prevents melting and ensures the filling stays perfectly nestled inside.
Step 8: Enjoy your Homemade Twinkies Recipe
Slice into your homemade treats and delight in the soft cake paired with that silky, sweet cream. There’s no better reward than biting into a Twinkie made with love from scratch!
How to Serve Homemade Twinkies Recipe
Garnishes
While classic Twinkies shine on their own, a light dusting of powdered sugar or a drizzle of melted chocolate can elevate their appearance and flavor. A sprinkle of toasted coconut or chopped nuts adds a lovely textural contrast if you’re feeling adventurous.
Side Dishes
Serve your Homemade Twinkies Recipe alongside a scoop of vanilla ice cream or fresh berries for a delightful dessert plate. A hot cup of coffee or creamy milk pairs beautifully, creating a comforting, well-rounded treat experience.
Creative Ways to Present
Fancy a fun twist? Slice the Twinkies in half and layer them with fresh whipped cream and fruit to make mini shortcakes. Or dip them in chocolate ganache and chill for a dark, decadent coating. They also work wonderfully as a base for trifles or parfait jars.
Make Ahead and Storage
Storing Leftovers
Store your Homemade Twinkies Recipe in an airtight container in the refrigerator to keep the cake moist and the cream fresh. They will stay delicious for 3 to 4 days, making them perfect for prepping ahead or enjoying over a few days.
Freezing
If you want to save some for later, wrap each Twinkie individually in plastic wrap and place them in a freezer-safe bag or container. When frozen properly, they maintain their texture and flavor for up to 2 months.
Reheating
For best results, thaw frozen Twinkies overnight in the refrigerator. Serve them chilled or at room temperature—the cream filling is meant to be cool and smooth. Avoid microwaving as it can melt the filling and alter the cake’s softness.
FAQs
Can I use regular cupcake pans instead of Twinkie molds?
Absolutely! While Twinkie molds give that characteristic shape, cupcake pans work just fine. Just make sure to fill them about two-thirds full and adjust baking time if needed.
Is the cream filling difficult to make?
Not at all! The classic cream filling is simple to prepare with powdered sugar, softened butter, vanilla extract, and a bit of milk for smooth consistency. It’s just a few minutes of mixing and you’re done.
Can I make this recipe gluten-free?
Yes, you can substitute all-purpose flour with a gluten-free blend. Just ensure your baking powder and other ingredients are gluten-free as well. The texture might be slightly different but still delicious.
How long do Homemade Twinkies keep fresh?
Refrigerated in an airtight container, your Homemade Twinkies Recipe remains fresh and tasty for 3 to 4 days. Beyond that, they might start to dry out or lose cream freshness.
Can I make the cake and filling separately ahead of time?
Yes, you can bake the cake layers a day ahead and store them wrapped tightly. Prepare the cream filling separately and pipe it in just before serving to keep that filling perfectly creamy and fresh.
Final Thoughts
Nothing beats the joy of making a Homemade Twinkies Recipe from scratch—each bite a mix of nostalgia and fresh, homemade flavor. Whether you’re baking for a special occasion or just treating yourself, this recipe will become one of your go-to favorites. So gather your ingredients, preheat that oven, and get ready for some seriously satisfying sweet moments!
Print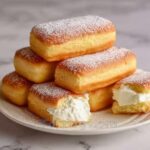
Homemade Twinkies Recipe
- Prep Time: 15 minutes
- Cook Time: 25 minutes
- Total Time: 40 minutes
- Yield: 12 servings
- Category: Baking
- Method: Baking
- Cuisine: American
Description
This Homemade Twinkies recipe recreates the classic American snack cake with a soft, golden sponge cake filled with a smooth, sweet cream filling. Perfect for dessert or a nostalgic treat, these Twinkies combine a light, fluffy texture with a rich vanilla cream center made from simple pantry ingredients.
Ingredients
Cake Batter
- 1 cup all-purpose flour
- 1 teaspoon baking powder
- 1/2 teaspoon baking soda
- 1/4 teaspoon salt
- 1/2 cup unsalted butter, softened
- 1 cup granulated sugar
- 2 large eggs
- 1 teaspoon vanilla extract
- 1/2 cup milk
Cream Filling
- Powdered sugar, quantity to taste (approximately 1 cup)
- Unsalted butter, softened (about 1/4 cup)
- 1 teaspoon vanilla extract
- Milk, as needed for consistency (about 1-2 tablespoons)
Instructions
- Preheat Oven: Preheat your oven to 350°F (175°C) to ensure it is ready for baking.
- Mix Dry Ingredients: In a bowl, combine the all-purpose flour, baking powder, baking soda, and salt to prepare the dry mix for the batter.
- Cream Butter and Sugar: In another bowl, beat the softened unsalted butter and granulated sugar together with an electric mixer until the mixture is light and fluffy, about 3 minutes. This step incorporates air into the batter for a light texture.
- Add Eggs: Add the eggs one at a time to the butter and sugar mixture, mixing well after each addition to ensure full incorporation and a smooth batter.
- Add Vanilla: Stir in the vanilla extract to infuse the batter with flavor.
- Combine Wet and Dry: Gradually add the dry flour mixture to the wet ingredients, alternating with the milk, beginning and ending with the dry ingredients. Mix gently until just combined to avoid overworking the batter.
- Prepare Baking Pans: Spoon the batter into Twinkie molds or greased cupcake pans, filling each cavity about two-thirds full to allow space for rising.
- Bake: Bake in the preheated oven for 20-25 minutes or until the cakes are golden brown and a toothpick inserted into the center comes out clean.
- Cool: Remove the cakes from the oven and allow them to cool completely to room temperature before filling.
- Prepare Cream Filling: In a bowl, beat together powdered sugar and softened butter until smooth. Add vanilla extract for flavor. Gradually add milk, one tablespoon at a time, until the cream filling reaches a piping consistency.
- Fill Twinkies: Using a piping bag, fill the cooled cakes with the cream filling by creating a small hole in the center or side of each cake and injecting the filling.
- Serve: Your homemade Twinkies are now ready to be enjoyed!
Notes
- If Twinkie molds are not available, greased cupcake pans work well as a substitute.
- Ensure the cakes are completely cooled before filling to prevent the cream from melting or leaking.
- The cream filling consistency can be adjusted using more or less milk depending on preference.
- Store filled Twinkies in an airtight container in the refrigerator for up to 3 days for best freshness.
- For a dairy-free version, substitute butter and milk with plant-based alternatives.