
If you have a sweet tooth and adore creamy, nostalgic desserts, you’re going to fall head over heels for this Magnolia Bakery Banana Pudding Recipe. It’s a timeless classic that beautifully combines layers of silky vanilla pudding, fresh banana slices, and crunchy Nilla Wafers all folded into a luscious whipped cream mixture. This dessert not only tastes like pure comfort in every spoonful but also brings a bit of bakery magic right to your own kitchen. Whether it’s for a family gathering, a potluck, or just a special treat, this recipe is straightforward and guaranteed to impress.
Ingredients You’ll Need
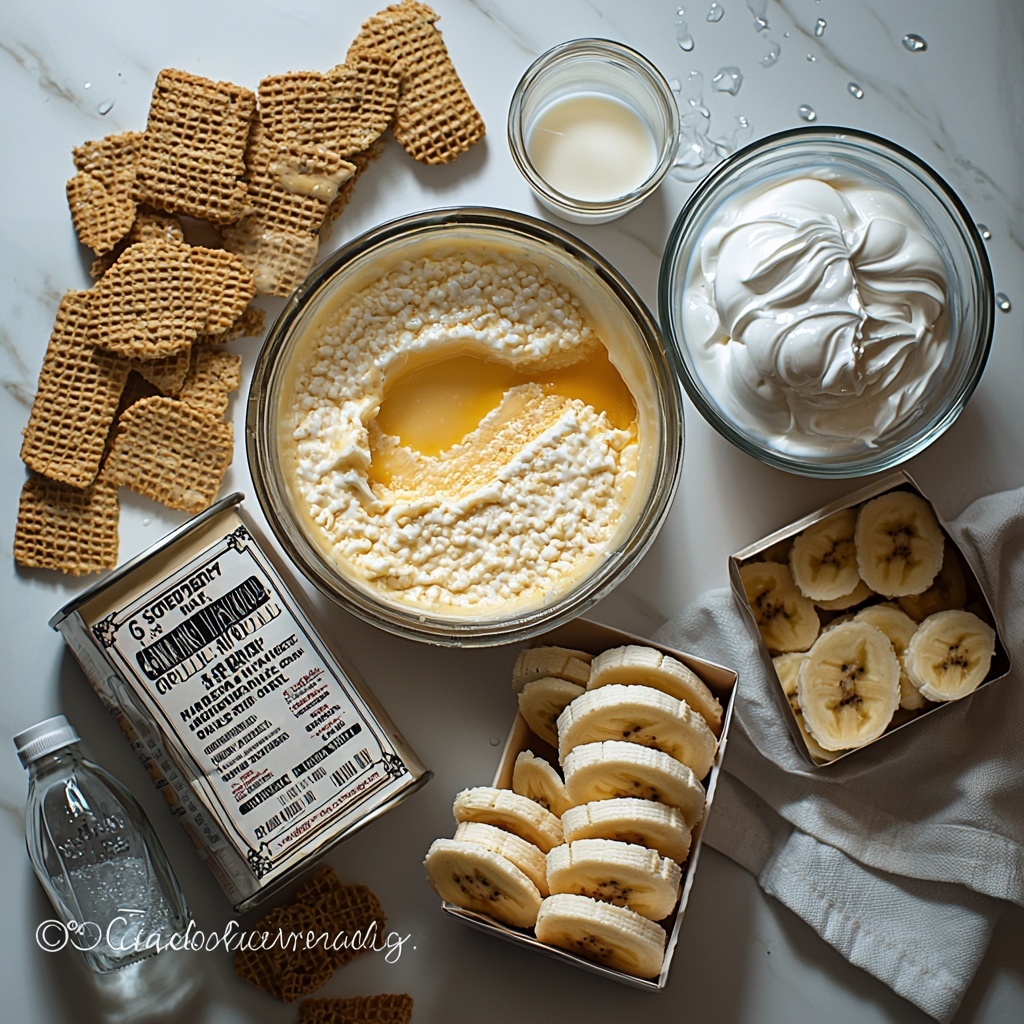
The magic of this recipe starts with simple, wholesome ingredients that together create perfect harmony in flavor and texture. Each ingredient plays a crucial role, from the creamy sweetness of sweetened condensed milk to the fresh punch of bananas, making the pudding both rich and refreshingly light.
- Sweetened condensed milk: Provides a luscious sweetness and creamy base that enhances the pudding’s texture.
- Very cold milk: Helps the pudding set perfectly without becoming too dense or watery.
- Very cold water: Lightens the mixture, balancing the richness for a smooth consistency.
- Instant vanilla pudding mix: Adds that signature thick, velvety pudding flavor you crave.
- Nilla Wafers (11-12 oz box): These iconic cookies give the dessert its irresistible crunch and classic Southern charm.
- Heavy whipping cream: Whipped to stiff peaks, it brings airy lightness and a silky finish when folded into the pudding.
- Clear vanilla flavoring: Adds aromatic depth without changing the dessert’s lovely pale color.
- Bananas (just barely ripe): Fresh, slightly firm bananas provide natural sweetness and a tender texture.
How to Make Magnolia Bakery Banana Pudding Recipe
Step 1: Mix the Pudding Base
Start by combining sweetened condensed milk with cold water and milk using a mixer on low-medium speed. This blend is the foundation of your pudding’s silky richness, so mixing just a minute or two is perfect to start melding those flavors.
Step 2: Incorporate Instant Vanilla Pudding
Next, sprinkle in your instant vanilla pudding mix and increase the mixer speed to medium. Beat for two minutes to start thickening the mix, aiming for that classic pudding texture that clings gently to your spoon.
Step 3: Chill to Set
Cover your pudding mixture and place it in the refrigerator for at least four hours or overnight. This step is crucial because it lets the flavors deepen while the pudding fully sets, creating that perfect consistency you’re aiming for.
Step 4: Whip the Cream
While the pudding chills, it’s time to whip your heavy cream with the clear vanilla flavoring until it holds stiff peaks. The whipped cream will lighten the pudding base and add a gorgeous fluffy texture, turning this dessert into something truly heavenly.
Step 5: Fold Cream into Pudding
Once the pudding is set, gently fold the whipped cream into it using a spatula. Take your time for a uniform mix with no streaks, ensuring that every bite will be creamy and smooth with just the right bit of airiness.
Step 6: Build the Layers
Choose a large bowl or trifle dish for your presentation, or go individual with mini trifle glasses. Start by laying down a layer of about one-third of the Nilla Wafers at the bottom; this crunchy base is essential for texture contrast.
Step 7: Add Banana Slices
Next, spread one and a half cups of those freshly sliced bananas evenly on top of the wafers. The fresh fruity layer balances the creamy and crunchy elements beautifully.
Step 8: Spoon on Pudding Layer
Top the bananas with one-third of the whipped pudding mixture, smoothing it gently to cover all the bananas and wafers underneath. This luscious layer brings it all together.
Step 9: Repeat Layers
Keep layering wafers, banana slices, and pudding two more times until you have three stunning tiers that build up that iconic Magnolia Bakery Banana Pudding look and flavor.
Step 10: Finish with Crushed Wafers
Crush the remaining 5-6 reserved wafers and sprinkle generously on top to create a delightful crunchy topping. Using leftover crumbs from the box adds an extra touch of texture and that bakery appeal. Cover and refrigerate until serving.
How to Serve Magnolia Bakery Banana Pudding Recipe
Garnishes
For a little extra wow factor, garnish the top with a few fresh banana slices or a sprig of mint. You can even add a light dusting of cinnamon or nutmeg, but the pudding itself shines brightest with the classic wafer crumbs.
Side Dishes
This pudding pairs wonderfully with a cup of strong black coffee or a light dessert wine to complement the creamy sweetness. A fresh fruit salad or simple shortbread cookies also marry well alongside for a balanced dessert experience.
Creative Ways to Present
Try serving this pudding in individual glass jars or mini trifle bowls for elegant single servings at parties. Layering the pudding in clear containers beautifully shows off each component and makes for a stunning visual that’s sure to impress your guests.
Make Ahead and Storage
Storing Leftovers
This dessert keeps beautifully refrigerated in an airtight container for up to three days. The layers soften slightly over time, but the flavors only deepen — just be sure to cover tightly to prevent the pudding from absorbing any fridge odors.
Freezing
The Magnolia Bakery Banana Pudding Recipe is best enjoyed fresh, as freezing can change the texture of both pudding and bananas. If you do freeze it, do so without the banana layers and add fresh slices when thawed for a better experience.
Reheating
Since this is a chilled pudding, reheating is not recommended. Simply chill it well before serving to keep its creamy texture and refreshing taste at its best.
FAQs
Can I use fresh homemade vanilla pudding instead of instant?
While you can use homemade pudding, the instant vanilla pudding mix is key to achieving the authentic texture and flavor in this Magnolia Bakery Banana Pudding Recipe. It helps the dessert set firmly yet stay creamy and smooth.
What type of bananas should I choose?
Use bananas that are just barely ripe — they should have a few brown spots but still be firm. Overripe bananas can be too mushy and may make the pudding soggy too quickly.
Can I prepare this pudding a day in advance?
Absolutely! In fact, making it the day before serving allows the flavors to meld together beautifully, giving you that perfect set and taste that everyone will love.
Is it okay to substitute heavy cream with something lighter?
Heavy cream is crucial for that light, airy texture when whipped. Substituting with lighter creams or milk won’t give the same richness or ability to hold stiff peaks, so stick with heavy cream if possible.
How do I prevent the banana slices from browning?
You can brush the banana slices lightly with lemon juice before layering. This helps slow oxidation and keeps your pudding looking fresh and appealing longer.
Final Thoughts
If you’re ready to dive into a dessert that’s the perfect mix of creamy, crunchy, and fruity, this Magnolia Bakery Banana Pudding Recipe is calling your name. It’s a little slice of heaven that brings people together and always draws compliments. Trust me, once you try this recipe, it’ll become your go-to crowd-pleaser, just like one of my favorite sweet indulgences I love sharing with friends.
Print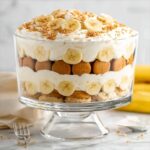
Magnolia Bakery Banana Pudding Recipe
- Prep Time: 20 minutes
- Cook Time: 0 minutes
- Total Time: 4 hours 20 minutes
- Yield: 16 servings
- Category: Dessert
- Method: No-Cook
- Cuisine: American
Description
This Magnolia Bakery Banana Pudding is a classic, creamy dessert featuring layers of creamy vanilla pudding, fresh bananas, and crunchy Nilla Wafers. The pudding is made from scratch with instant vanilla pudding mix, sweetened condensed milk, and whipped cream, creating a smooth and luscious texture. Chilled for hours to let the flavors meld perfectly, it’s a delightful, comforting treat that’s perfect for gatherings or a special family dessert.
Ingredients
Pudding Mixture
- 1 14-oz can sweetened condensed milk
- 1 cup very cold milk
- ½ cup very cold water
- 1 3.4 oz box instant vanilla pudding mix
Whipped Cream
- 3 cups heavy whipping cream
- ½ teaspoon clear vanilla flavoring
Other Ingredients
- 1 11 – 12 oz box of Nilla Wafers (reserve 5–6 wafers and some crumbs from the box)
- 5 bananas (just barely ripe, sliced)
Instructions
- Mix Dairy Ingredients: Using a hand-held or stand mixer, combine the sweetened condensed milk, cold water, and cold milk. Mix on low-medium speed for 1-2 minutes until well blended.
- Add Pudding Mix: Add the instant vanilla pudding mix to the dairy blend and beat on medium speed for 2 minutes. The mixture should begin to thicken.
- Chill Pudding: Cover the pudding mixture and refrigerate for 4 hours or overnight to let it fully set and develop flavor.
- Whip Cream: Using a mixer, beat the heavy whipping cream with clear vanilla flavoring until stiff peaks form, indicating the cream is properly whipped.
- Fold Whipped Cream Into Pudding: Gently fold the whipped cream into the chilled pudding mixture until fully combined and uniform in color, with no streaks.
- Prepare Serving Dish: Choose a large serving bowl, trifle dish, or individual mini trifle dishes. Line the bottom with one-third of the Nilla Wafers (approximately 30 wafers).
- Layer Bananas: Evenly layer 1 ½ cups of sliced bananas over the wafers.
- Add Pudding Layer: Spread one-third of the pudding mixture evenly on top of the bananas.
- Repeat Layers: Repeat the layers two more times to create three tiers of wafers, bananas, and pudding total.
- Crush Reserved Wafers: Crush the reserved 5-6 wafers into small pieces for garnish.
- Finish and Chill: Sprinkle the top layer of pudding with the crushed wafers and any leftover wafer crumbs. Cover the dish and refrigerate until ready to serve.
Notes
- For best texture, use just barely ripe bananas to avoid overly mushy slices.
- Chilling the pudding mixture for at least 4 hours is essential for the right consistency and flavor melding.
- You can prepare this the day before serving to save time and enhance the flavors.
- Use a gentle folding technique to maintain the lightness of the whipped cream in the pudding.
- For individual servings, mini trifle dishes make a beautiful presentation.
- Keep the assembled pudding refrigerated until serving to preserve freshness and texture.
