“`html
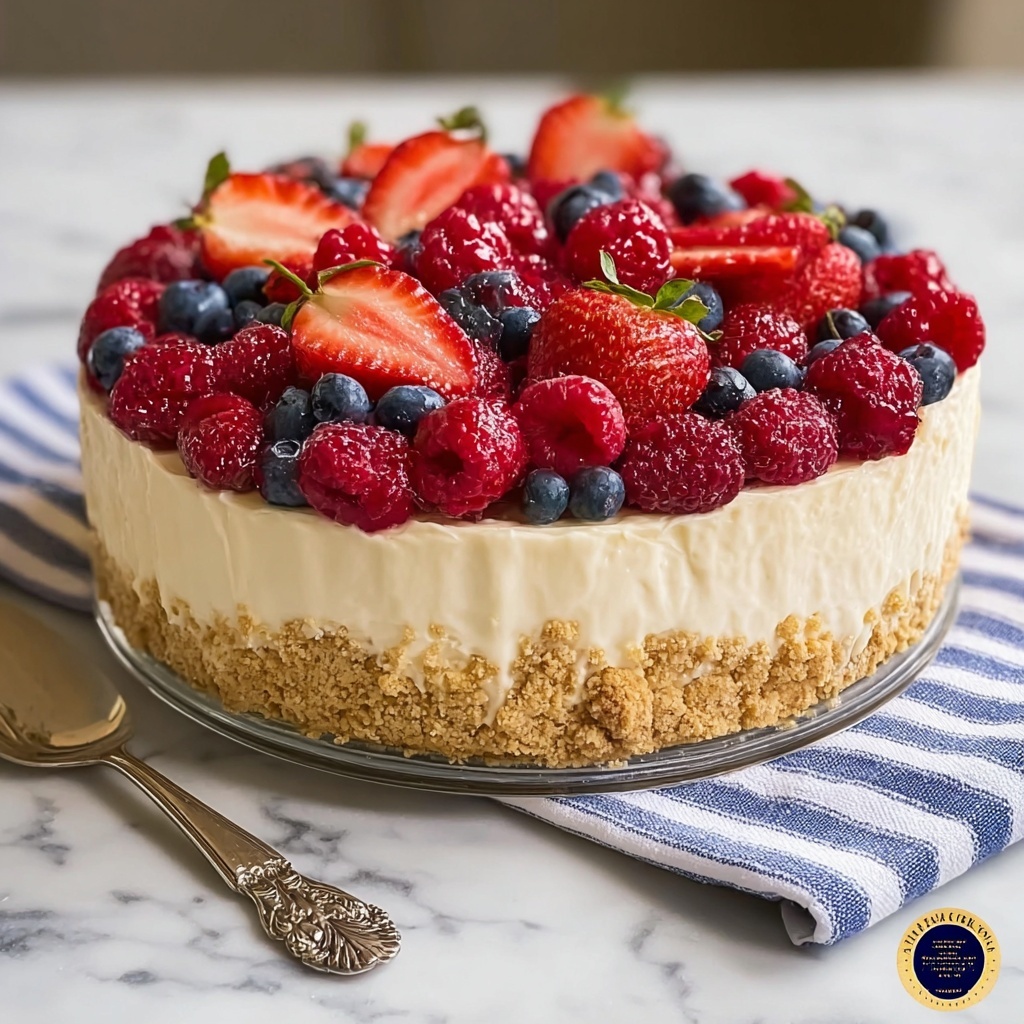
If you’re looking for a showstopping dessert that combines creamy, dreamy goodness with a playful, patriotic design, the No-Bake Cheesecake Flag Cake Recipe is your new best friend. This dessert brings together the smooth richness of cream cheese and mascarpone with the bright freshness of berries, all layered over a wonderfully crisp cocoa-infused graham cracker crust. Perfect for summer gatherings, holidays, or anytime you want a delightful dessert that doesn’t require turning on the oven, this cake will wow your guests and satisfy any sweet tooth with ease.
Ingredients You’ll Need
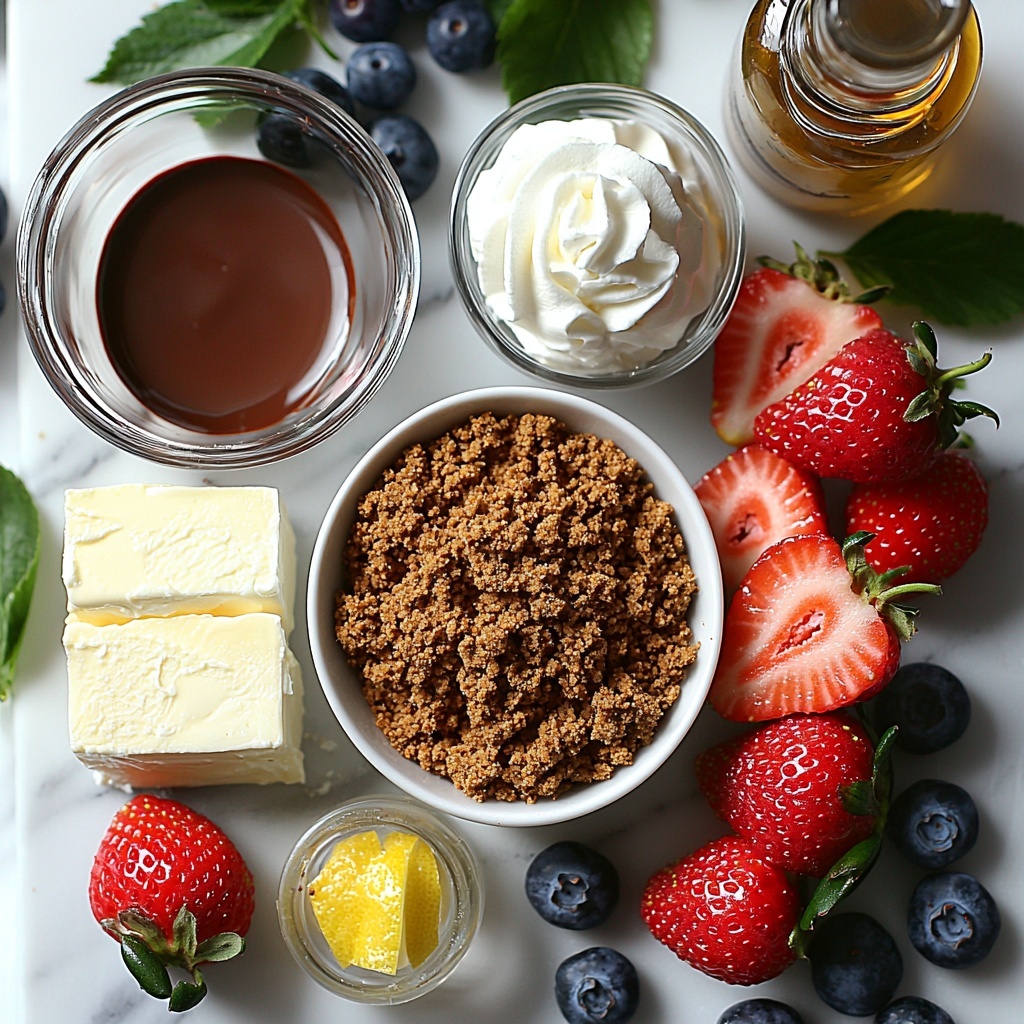
This No-Bake Cheesecake Flag Cake Recipe calls for simple, wholesome ingredients that each play an essential role in creating its irresistible texture, flavor, and vibrant appearance. From the buttery crust to the fluffy filling and fresh berries, every component comes together beautifully with just a handful of pantry staples and fresh fruit.
- 1 ½ cups finely crushed graham cracker crumbs: Provides a crunchy, slightly sweet base that holds everything together perfectly.
- ¼ cup white sugar: Sweetens the crust for balanced flavor without overpowering.
- 2 tablespoons unsweetened cocoa powder: Adds subtle chocolate depth that makes the crust extra special.
- 6 tablespoons butter, melted: Binds the crust ingredients into a firm, sliceable foundation.
- 1 cup cream cheese at room temperature: Gives the cheesecake filling its rich and creamy texture.
- 1 cup mascarpone cheese at room temperature: Adds luxurious smoothness and a delicate tang to the filling.
- 2 teaspoons grated lemon zest: Brightens and lifts the cheesy filling with fresh citrus notes.
- 2 teaspoons lemon juice: Enhances the tartness and complements the sweetness perfectly.
- 1 teaspoon vanilla extract: Adds warmth and depth of flavor for that classic cheesecake taste.
- ⅓ cup white sugar: Sweetens the creamy filling gently for a perfect balance.
- 1 ¼ cups cold heavy whipping cream: Whipped into fluffy peaks to lighten and aerate the filling beautifully.
- 20 large fresh strawberries, hulled and halved lengthwise: Creates the bold red stripes of the flag with freshness and vibrant color.
- 24 large fresh blueberries: Forms the blue field for a spectacular, patriotic presentation.
How to Make No-Bake Cheesecake Flag Cake Recipe
Step 1: Create the Cocoa Graham Cracker Crust
Start by blending the finely crushed graham cracker crumbs with sugar, cocoa powder, and melted butter until the mixture is crumbly and well combined. This chocolatey twist on the classic crust sets the stage for the cheesecake, giving it a slightly rich and textured base. Press it evenly into a 9×11-inch baking dish, then chill it in the fridge for about 30 minutes until firm—this ensures your crust holds together without cracking when you slice it later.
Step 2: Prepare the Creamy Cheesecake Filling
In a bowl, mix the cream cheese and mascarpone cheese until wonderfully smooth and combined. Then stir in fresh lemon zest, lemon juice, and vanilla extract – these add bright complexity and a hint of zing that balances the richness. In a separate chilled bowl, whisk the heavy whipping cream with sugar until soft peaks form. Gently fold the whipped cream into the cream cheese mixture to keep the filling airy and luscious, the perfect dreamy consistency for this no-bake cheesecake.
Step 3: Assemble and Chill the Cheesecake Layer
Spoon the fluffy cheesecake filling over the cooled crust, smoothing it out with a spatula for an even top. Give the pan a few gentle taps on the counter to settle the filling nicely. Cover tightly with plastic wrap and refrigerate for at least 3 hours—this step is crucial as it allows the cheesecake to firm up and develop its silky texture. Patience here means perfection.
Step 4: Decorate with the Flag Pattern
Once chilled, it’s time to have fun and decorate! Begin at the bottom long edge, placing strawberry halves in a neat horizontal stripe with the pointed ends facing right. Build a second shorter stripe at the top right following the same berry direction. Continue layering 3 more full-length strawberry stripes spaced evenly to create the red lines of the flag, leaving a square in the upper left corner. Fill that square with rows of blueberries arranged close together, blossom ends facing up, completing the classic stars and stripes look. The fresh berries not only add vibrant color but also a juicy, refreshing bite that contrasts beautifully with the creamy cheesecake.
Step 5: Serve Your Stunning No-Bake Cheesecake Flag Cake Recipe
Carefully slice into squares and serve chilled for a crowd-pleasing dessert that looks as impressive as it tastes. Each bite delivers a perfect balance of creamy, crunchy, tart, and sweet, making this no-bake cheesecake flag cake a guaranteed favorite.
How to Serve No-Bake Cheesecake Flag Cake Recipe
Garnishes
While the fresh strawberries and blueberries do the heavy lifting on decoration, feel free to add a few mint leaves or a dusting of powdered sugar right before serving. These simple touches add a hint of freshness and elegance that enhance each slice’s appearance and flavor.
Side Dishes
This cake pairs wonderfully with light sides like a crisp green salad or fresh fruit salad to keep your meal balanced and refreshing. For an extra indulgent touch, a dollop of homemade whipped cream or a drizzle of berry coulis can elevate the dessert experience.
Creative Ways to Present
Try serving individual No-Bake Cheesecake Flag Cake Recipe portions in clear glass cups layered with berry sauce for a deconstructed twist. Alternatively, use a smaller pan to create single-serving sizes, making it easier for guests to grab and enjoy at picnics or parties without fuss.
Make Ahead and Storage
Storing Leftovers
Store any leftover No-Bake Cheesecake Flag Cake Recipe tightly covered in the refrigerator to keep it fresh and protected from absorbing other fridge odors. It will maintain its creamy texture and fresh flavors beautifully for up to 3-4 days—perfect for enjoying a few extra slices or surprising someone with a sweet treat later.
Freezing
If you want to freeze the cake, wrap it tightly in plastic wrap and then in aluminum foil or a freezer-safe container. It will freeze well for up to one month. When ready to enjoy, thaw it overnight in the fridge to preserve the delicate texture and flavors.
Reheating
This dessert is best served cold, so no reheating is needed or recommended. Keeping it chilled ensures you enjoy the perfect creamy consistency paired with fresh, juicy berries.
FAQs
Can I use regular cream cheese instead of mascarpone?
Yes, the recipe already includes cream cheese and mascarpone to strike a balance of tang and creaminess. If mascarpone isn’t available, you can substitute with all cream cheese, but mascarpone adds a smoother, silkier texture that enhances the cheesecake filling.
How do I prevent the crust from becoming soggy?
Pressing the crust firmly into the pan and chilling it for 30 minutes before adding the filling helps it set well and resist sogginess. Also, ensure the crust is evenly packed to create a solid base that holds up under the creamy cheesecake layer.
Are the fresh berries necessary?
While the fresh strawberries and blueberries are key to creating the beautiful flag design and contributing fresh, juicy bites, you could experiment with frozen berries if fresh aren’t available. Just make sure to thaw and drain them well to avoid excess moisture.
Can I make this No-Bake Cheesecake Flag Cake Recipe ahead of time for a party?
Absolutely! You can prepare the crust and filling a day or two in advance and decorate with berries just before serving to keep everything fresh and vibrant. This makes it a great make-ahead dessert for celebrations.
What pan size should I use for this cake?
The original recipe calls for a 9×11-inch baking dish, which is perfect for creating a cake that serves about one generous serving as styled here. For more servings, simply scale the ingredients and use a larger dish or multiple pans.
Final Thoughts
The No-Bake Cheesecake Flag Cake Recipe is a delightful, eye-catching dessert that’s surprisingly simple to make but looks like a labor of love. Its combination of creamy cheesecake, crunchy chocolatey crust, and fresh berries makes it a real crowd-pleaser. Whether you’re celebrating a special occasion or simply want to treat yourself and your friends, this recipe is sure to bring smiles around the table. Give it a try and enjoy every luscious, festive bite!
“`
Print
No-Bake Cheesecake Flag Cake Recipe
- Prep Time: 20 minutes
- Cook Time: 0 minutes
- Total Time: 3 hours 20 minutes
- Yield: 12 servings
- Category: Dessert
- Method: No-Cook
- Cuisine: American
- Diet: Vegetarian
Description
This No-Bake Cheesecake Flag Cake is a patriotic dessert featuring a rich and creamy cheesecake filling on a chocolate graham cracker crust, decorated with fresh strawberries and blueberries to resemble the American flag. It’s a delightful and visually stunning dessert perfect for summer celebrations or patriotic holidays, requiring no baking and just a few hours of chilling time.
Ingredients
Crust
- 1 ½ cups finely crushed graham cracker crumbs
- ¼ cup white sugar
- 2 tablespoons unsweetened cocoa powder
- 6 tablespoons butter, melted
Cheesecake Filling
- 1 cup cream cheese at room temperature
- 1 cup mascarpone cheese at room temperature
- 2 teaspoons grated lemon zest
- 2 teaspoons lemon juice
- 1 teaspoon vanilla extract
- ⅓ cup white sugar
- 1 ¼ cups cold heavy whipping cream
Topping
- 20 large fresh strawberries, hulled and halved lengthwise, or as needed
- 24 large fresh blueberries, or as needed
Instructions
- Prepare the crust: Combine graham cracker crumbs, ¼ cup sugar, cocoa powder, and melted butter in a bowl until the mixture is crumbly and well mixed.
- Set the crust: Press the crust mixture evenly into the bottom of a 9×11-inch baking dish. Cover with plastic wrap and refrigerate for about 30 minutes until firm.
- Make the cheesecake filling base: In a bowl, mix together cream cheese and mascarpone cheese until smooth. Add lemon zest, lemon juice, and vanilla extract and stir to combine.
- Whip the cream: In a separate chilled bowl, whisk ⅓ cup sugar into the cold heavy whipping cream until soft peaks form.
- Combine filling: Gently fold the whipped cream into the cheese mixture until soft, fluffy, and well incorporated.
- Assemble the cake: Spread the filling evenly over the chilled crust. Tap the pan gently on the counter to remove air bubbles. Cover tightly with plastic wrap and refrigerate for at least 3 hours until set.
- Decorate with strawberries: Arrange strawberry halves starting along the bottom long edge of the cake in horizontal stripes, with the pointed ends facing right, creating multiple full-length stripes and a shorter stripe to reserve a square for blueberries.
- Add blueberries: Fill the reserved square in the upper left corner with rows of blueberries, placing them blossom side up, tightly packed.
- Serve: Cut the cheesecake into squares and serve chilled.
Notes
- Make sure the cream cheese and mascarpone are at room temperature to create a smooth filling without lumps.
- Press the crust firmly and evenly to avoid crumbling while serving.
- Refrigerate the cake well before decorating to allow it to set firmly.
- Use fresh, ripe strawberries and blueberries for best flavor and visual appeal.
- This recipe is egg-free and perfect for warm weather as it requires no baking.


