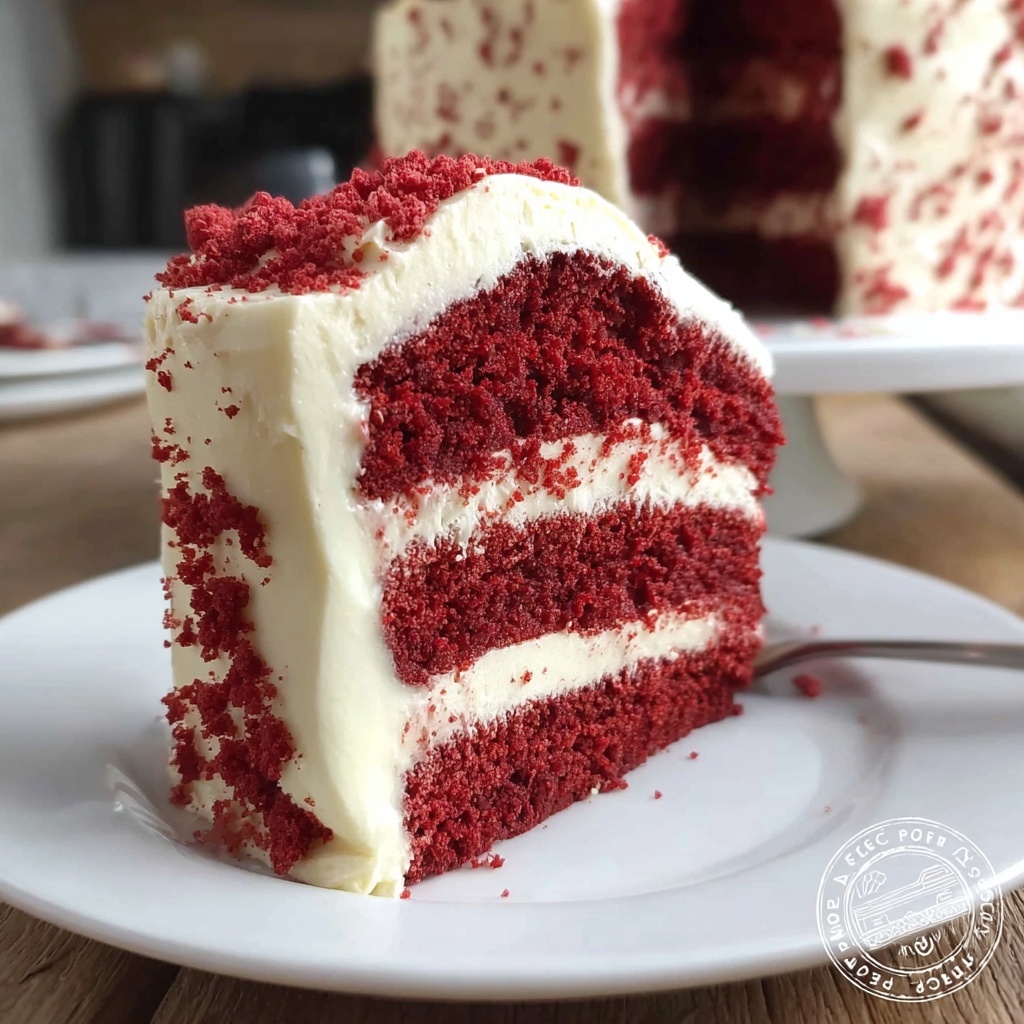
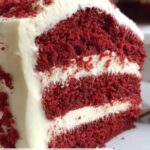
If there’s one show-stopping dessert that truly steals the Christmas spotlight, it has to be the Red Velvet Layer Cake for Christmas: 7 Reasons to Love It Recipe. This cake is more than just a festive treat — it’s a perfect combination of moist, tender layers with that unmistakable red hue and a silky cream cheese frosting that makes each bite unforgettable. Whether you’re baking for a holiday party or a cozy family gathering, this cake is guaranteed to fill your home with warmth, joy, and dozens of “wow” moments around the table.
Ingredients You’ll Need
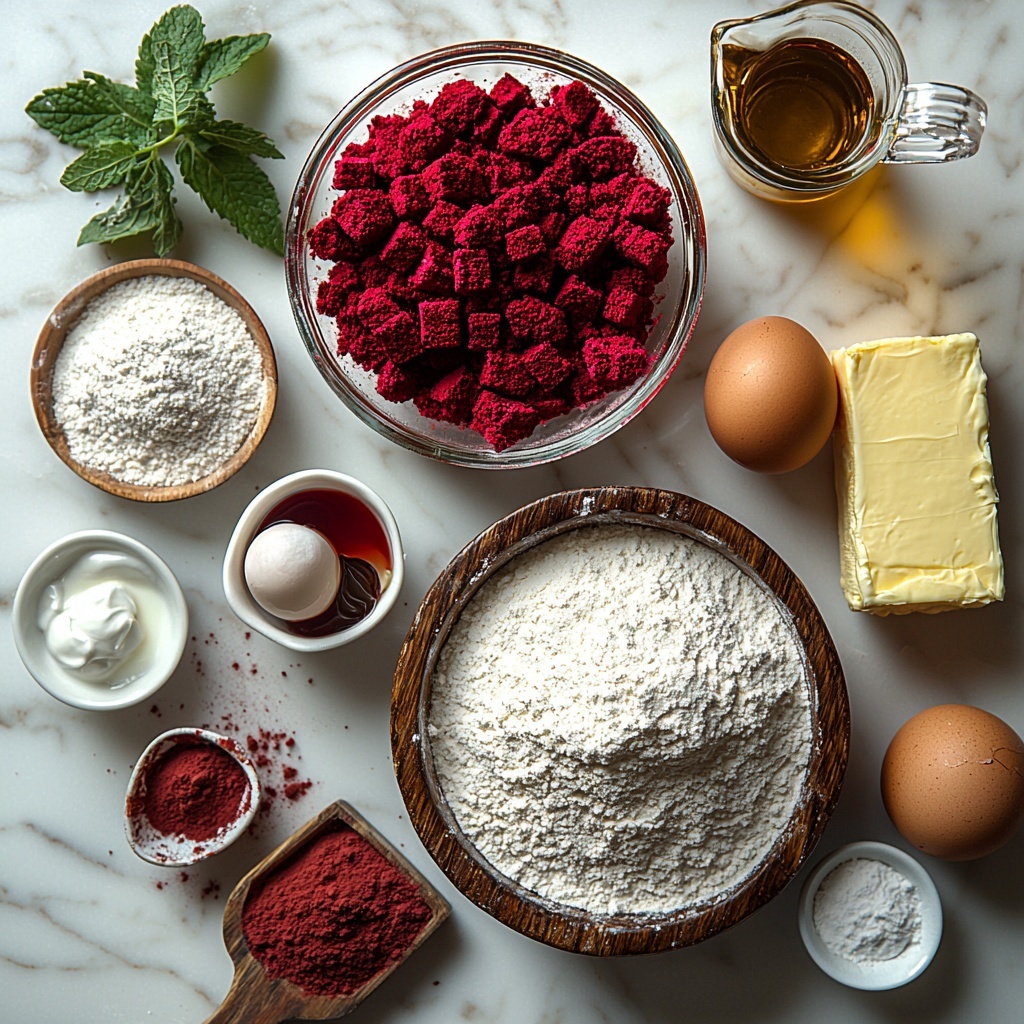
This recipe uses straightforward ingredients you’ll often find in your pantry, but each plays a crucial role in building the cake’s delightful texture, rich flavor, and gorgeous red color. Every item is carefully chosen to bring out the best in this classic holiday cake.
- 2 1/2 cups all-purpose flour: The foundation for tender yet sturdy cakes that hold their shape beautifully.
- 1 1/2 cups granulated sugar: Sweetens while helping to create a moist crumb.
- 1 teaspoon baking soda: Acts as a leavening agent to give the cake its lightness.
- 1 teaspoon salt: Enhances and balances the sweetness.
- 1 teaspoon cocoa powder: Adds just a hint of chocolate depth, a signature note in red velvet.
- 1 1/2 cups vegetable oil: Keeps the cake soft and moist without heaviness.
- 1 cup buttermilk, room temperature: Brings a gentle tang and tender crumb thanks to its acidity.
- 2 large eggs, room temperature: Bind the batter and provide richness.
- 2 tablespoons red food coloring: Gives this cake its iconic, vibrant red that screams holiday cheer.
- 1 teaspoon vanilla extract: Delivers warmth and enhances all the flavors.
- 1 teaspoon white vinegar: Reacts with the baking soda for extra fluffiness.
- 8 oz cream cheese, softened: The star ingredient in the frosting that’s smooth, tangy, and luxurious.
- 1/2 cup unsalted butter, softened: Adds richness and a creamy texture to the frosting.
- 4 cups powdered sugar: Sweetens the frosting while ensuring it whips up fluffy and spreadable.
- 1 teaspoon vanilla extract (for frosting): A final touch of flavor that rounds out the frosting’s profile.
How to Make Red Velvet Layer Cake for Christmas: 7 Reasons to Love It Recipe
Step 1: Preheat and Prepare Your Pans
Start by heating your oven to 350°F (175°C) and get three 9-inch round cake pans ready by greasing and flouring them. This prep ensures your cakes won’t stick and will come out perfectly shaped, making every layer picture-perfect.
Step 2: Mix Dry Ingredients
In a large bowl, whisk together the flour, sugar, baking soda, salt, and cocoa powder. Combining these dry ingredients first smooths out the cocoa’s texture and evenly distributes the leavening for consistent rise.
Step 3: Combine Wet Ingredients
In a separate bowl, mix together the vegetable oil, room temperature buttermilk, eggs, red food coloring, vanilla, and white vinegar. This blend balances moisture, color, and tang, setting the tone for the cake’s signature flavor and look.
Step 4: Bring It All Together
Gradually stir the wet ingredients into the dry mixture until just combined. The batter should be smooth with a vibrant red hue. Be careful not to overmix to keep the cake tender and light.
Step 5: Bake Your Layers
Divide the batter evenly between your three prepared pans. Place them in the oven and bake for 25-30 minutes, or until a toothpick inserted in the center comes out clean. This timing yields beautifully baked layers that are moist yet hold up well to stacking.
Step 6: Cool the Cakes
Let the cakes cool in their pans for 10 minutes to firm up before transferring them to wire racks to cool completely. This step is important to avoid breaking the delicate layers when frosting.
Step 7: Whip Up the Frosting
Beat the softened cream cheese and butter together until smooth and creamy. Gradually add powdered sugar and vanilla extract, whipping until the frosting is fluffy and spreadable. This luscious frosting perfectly balances sweet and tangy flavors that elevate the whole cake.
Step 8: Assemble and Frost
Once your cake layers are fully cooled, spread a generous layer of frosting between each cake. Stack the layers and finish by frosting the top and sides of the cake. The creamy, velvety frosting complements the tender cake beautifully and makes every slice just irresistible.
How to Serve Red Velvet Layer Cake for Christmas: 7 Reasons to Love It Recipe
Garnishes
To add an extra touch of festive magic, consider garnishing your Red Velvet Layer Cake for Christmas: 7 Reasons to Love It Recipe with fresh cranberries, a sprinkle of edible gold stars, or even a dusting of cocoa powder. These subtle touches turn your cake into a stunning centerpiece that tastes as good as it looks.
Side Dishes
This cake pairs wonderfully with simple sides like a dollop of freshly whipped cream or a scoop of vanilla bean ice cream. For a holiday party, complement it with spiced mulled wine or a hot cup of rich coffee to balance out the sweetness and make your dessert experience complete.
Creative Ways to Present
Feeling adventurous? Try serving individual slices on pretty holiday plates with a drizzle of raspberry sauce or a sprinkle of crushed peppermint candies. Layer cake pops made from leftover crumbs are another festive way to enjoy the flavors in a fun, bite-sized form that guests will adore.
Make Ahead and Storage
Storing Leftovers
If you’re lucky enough to have leftovers, store the Red Velvet Layer Cake for Christmas: 7 Reasons to Love It Recipe in an airtight container in the refrigerator. Properly covered, it will stay fresh and moist for 3-4 days — giving you plenty of time to enjoy its heavenly flavors again.
Freezing
You can freeze the cake to savor later by wrapping it tightly in plastic wrap and then foil. When properly stored, it keeps well for up to 2 months without losing its delicious texture. Thaw in the refrigerator overnight before serving for best results.
Reheating
This delightful cake tastes best chilled or at room temperature, so reheating isn’t typically necessary. However, if you prefer a slightly warmer slice, let it sit at room temperature for about 30 minutes before serving — this brings out the richness of the frosting without compromising texture.
FAQs
Can I use regular milk instead of buttermilk?
Buttermilk’s acidity is key to the tender crumb and subtle tang of the cake, so if you don’t have buttermilk, you can make a substitute by adding 1 tablespoon of white vinegar or lemon juice to 1 cup of milk and letting it sit for 5 minutes.
What if I don’t have red food coloring?
Red food coloring is what gives this cake its iconic look, but you can experiment with natural alternatives like beet juice or powdered freeze-dried raspberries, keeping in mind that the color may be slightly different but still delicious.
Can I make this cake gluten-free?
Absolutely! Use a gluten-free all-purpose flour blend that measures cup-for-cup like regular flour. You might notice a slight difference in texture but the flavors will remain wonderfully festive and rich.
How do I prevent the frosting from being too sweet?
Balancing cream cheese and butter helps keep the frosting from becoming overly sweet. If desired, start with slightly less powdered sugar and gradually add more until you reach your preferred sweetness and texture.
Can I double this recipe for a larger crowd?
Yes, you can easily double the ingredients and bake in larger pans or extra rounds. Just keep an eye on baking times, as larger cakes may need extra minutes to cook through.
Final Thoughts
There’s something truly special about the Red Velvet Layer Cake for Christmas: 7 Reasons to Love It Recipe that brings holiday celebrations to life. Its vibrant color, tender crumb, and luscious frosting create a dessert experience that’s both timeless and full of cheer. So roll up your sleeves, gather your ingredients, and make this festive treat your holiday tradition — I promise it will become a new favorite for years to come!
Print
Red Velvet Layer Cake for Christmas: 7 Reasons to Love It Recipe
- Prep Time: 20 minutes
- Cook Time: 30 minutes
- Total Time: 1 hour
- Yield: 12 servings
- Category: Dessert
- Method: Baking
- Cuisine: American
Description
A classic Red Velvet Layer Cake perfect for Christmas celebrations, featuring moist red velvet cake layers baked to perfection and frosted with a creamy, tangy cream cheese frosting. This recipe yields a festive, vibrant cake that serves 12 and brings both flavor and holiday cheer to your dessert table.
Ingredients
Cake Ingredients
- 2 1/2 cups all-purpose flour
- 1 1/2 cups granulated sugar
- 1 teaspoon baking soda
- 1 teaspoon salt
- 1 teaspoon cocoa powder
- 1 1/2 cups vegetable oil
- 1 cup buttermilk, room temperature
- 2 large eggs, room temperature
- 2 tablespoons red food coloring
- 1 teaspoon vanilla extract
- 1 teaspoon white vinegar
Frosting Ingredients
- 8 oz cream cheese, softened
- 1/2 cup unsalted butter, softened
- 4 cups powdered sugar
- 1 teaspoon vanilla extract
Instructions
- Preheat Oven: Preheat your oven to 350°F (175°C) to ensure it reaches the perfect temperature for baking the cake layers evenly.
- Prepare Cake Pans: Grease and flour three 9-inch round cake pans thoroughly to prevent the cakes from sticking.
- Mix Dry Ingredients: In a large mixing bowl, combine the all-purpose flour, granulated sugar, baking soda, salt, and cocoa powder, ensuring all dry ingredients are evenly distributed.
- Combine Wet Ingredients: In a separate bowl, whisk together the vegetable oil, room temperature buttermilk, eggs, red food coloring, vanilla extract, and white vinegar until fully blended.
- Combine Wet and Dry: Gradually add the wet ingredient mixture to the dry ingredients, mixing gently but thoroughly until the batter is smooth and homogenous.
- Divide Batter: Evenly divide the batter among the three prepared cake pans, smoothing the tops to ensure uniform layers.
- Bake the Cakes: Place the pans in the oven and bake for 25-30 minutes, or until a toothpick inserted into the center comes out clean.
- Cool the Cakes: Allow the cakes to cool in their pans for 10 minutes before transferring them carefully to wire racks to cool completely to room temperature.
- Prepare Frosting: In a mixing bowl, beat together the softened cream cheese and unsalted butter until smooth and creamy.
- Add Sugar and Vanilla: Gradually incorporate the powdered sugar and vanilla extract into the cream cheese mixture, beating until the frosting is light, fluffy, and free of lumps.
- Assemble the Cake: Once the cake layers are completely cool, spread an even layer of frosting on top of one cake layer, stack the next layer on top, and repeat. Finish by frosting the top and sides of the assembled cake evenly.
Notes
- Ensure all wet ingredients are at room temperature for better mixing and a smoother batter.
- Be careful not to overmix the batter to maintain a light and tender crumb.
- Use cream cheese and butter softened to room temperature for a lump-free frosting.
- Red food coloring is essential for the signature red hue but can be adjusted based on preference.
- Allow cakes to cool completely before frosting to prevent melting or sliding layers.
- For extra moisture, you can brush the layers with simple syrup before frosting.


