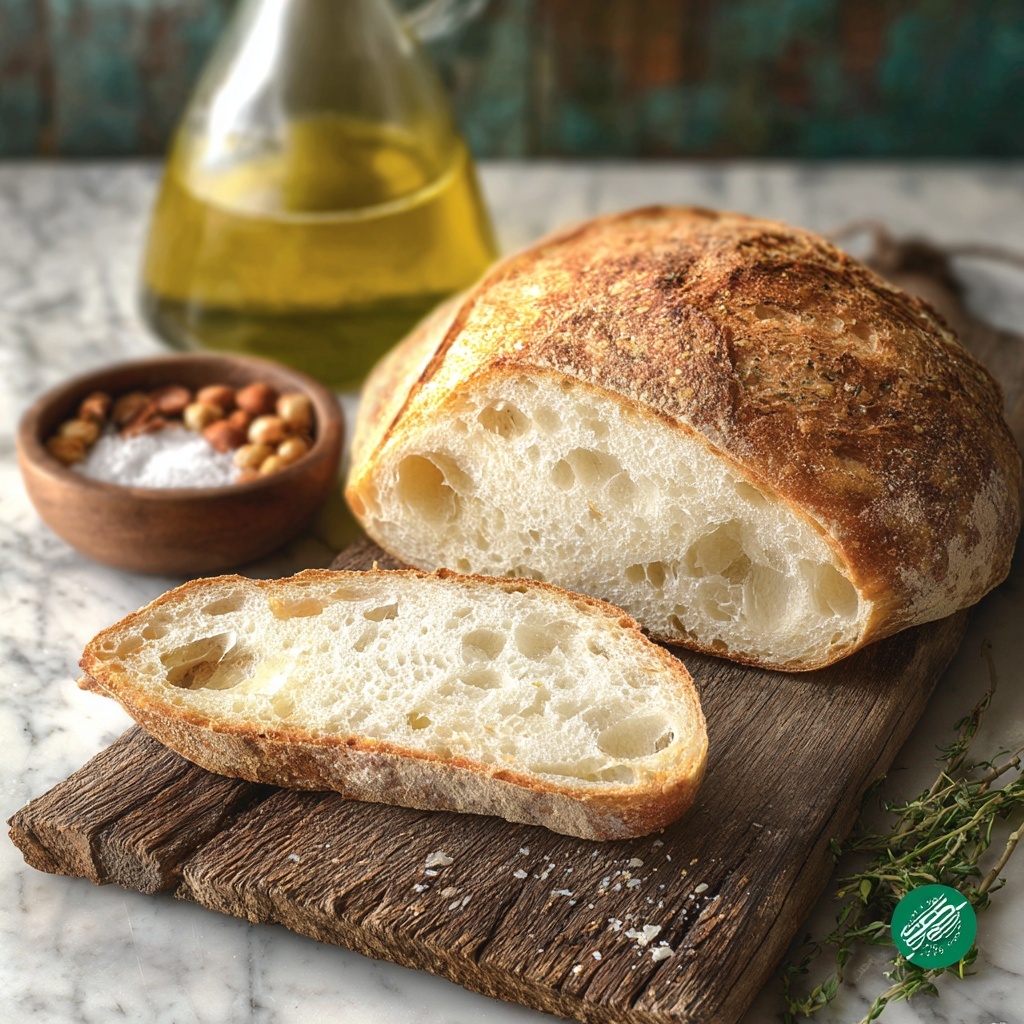
If you have ever dreamed of making a warm, crusty loaf that fills your kitchen with the irresistible scent of fresh bread, then this Rustic Italian Bread Recipe is your new best friend. It’s a simple yet deeply satisfying classic that captures the heart of traditional Italian baking with minimal ingredients and straightforward steps. Each bite delivers a perfect harmony of a golden, crunchy crust and a soft, chewy interior, making it an unbeatable centerpiece for any meal or a delightful snack all on its own.

Ingredients You’ll Need
These ingredients are simple pantry staples, but each plays an essential role in building the perfect Rustic Italian Bread. From flour that gives structure to the yeast that brings the loaf to life, every component contributes to the bread’s flavor, texture, and color.
- 4 cups all-purpose or bread flour: Flour is the backbone of this loaf, providing the necessary gluten and foundation for rise and texture.
- 1 ½ teaspoons salt: Salt enhances flavor and tightens gluten strands for that perfect crumb.
- 1 tablespoon sugar: A touch of sugar feeds the yeast and helps develop a lovely golden crust.
- 1 packet (2 ¼ teaspoons) active dry yeast: Yeast is the magic ingredient that causes the dough to rise and creates airy pockets inside.
- 1 ½ cups warm water (110°F): Warm water activates the yeast while hydrating the flour to form dough.
- 2 tablespoons olive oil (plus more for greasing): Olive oil adds richness, improves texture, and keeps the crust tender.
- Cornmeal or flour for dusting: Dusting prevents sticking and adds a rustic, artisanal touch to the loaf’s bottom.
How to Make Rustic Italian Bread Recipe
Step 1: Activate the Yeast
Start by combining warm water, sugar, and yeast in a large bowl. Stir gently and allow it to sit for 5 to 10 minutes until the mixture becomes foamy and bubbles form on the surface. This step is crucial because it tells you that your yeast is alive and ready to help your dough rise beautifully.
Step 2: Mix in the Olive Oil, Flour, and Salt
Next, add olive oil to the yeast mixture for moisture and flavor, then slowly incorporate the flour and salt. As you add the flour, stir gently until you see a shaggy dough coming together. This rustic, sticky initial dough is exactly what you want because it means the hydration levels are just right for a tender interior.
Step 3: Knead the Dough
Turn the shaggy mixture onto a floured surface and knead vigorously for 8 to 10 minutes until the dough becomes smooth and elastic. If it feels too sticky, sprinkle with a little more flour, but avoid adding too much. This step develops the gluten that provides the bread’s wonderful chewy texture.
Step 4: Let the Dough Rise
Place your dough into a lightly oiled bowl, turning it to coat all sides with oil. Cover it with a damp towel or plastic wrap and set aside in a warm place. Give it 1 to 1½ hours to double in size. This rise is like magic; the dough becomes airy and light, full of yeast bubbles that create the texture we love in rustic bread.
Step 5: Shape and Proof the Loaf
After the first rise, punch down the dough gently to release excess gas. Shape the dough into a rustic round or oval loaf, no need to be perfect; charm is in its uneven edges. Place it on a cornmeal-dusted baking sheet or parchment-lined pan, cover loosely, and let it rise again for 30 to 45 minutes, allowing it to puff up and develop more flavor.
Step 6: Preheat Oven and Prepare for Baking
Preheat your oven to 425°F. Just before baking, slash the top of the loaf with a sharp knife. This score not only makes it look like a classic Italian bread but also allows steam to escape, helping the loaf expand properly without cracking.
Step 7: Bake to Perfection
Place the bread into the oven. For an extra crisp crust, you can spritz water inside the oven or add a small pan of hot water to create steam. Bake for 25 to 30 minutes until the crust turns a beautiful golden brown and the bread sounds hollow when tapped on the bottom. Let it cool completely on a wire rack before slicing, so the crumb sets nicely.
How to Serve Rustic Italian Bread Recipe
Garnishes
A rustic loaf like this is stunning enough on its own, but offering it alongside dips like olive oil infused with herbs, balsamic vinegar, or even tapenade elevates the experience. Fresh crushed garlic rubbed lightly over warm slices also adds an irresistible fragrance and flavor boost.
Side Dishes
Rustic Italian bread shines as an accompaniment to hearty soups, vibrant salads, or classic pasta dishes. It’s perfect for soaking up rich sauces or serving as a base for bruschetta topped with fresh tomatoes and basil. Think of it as the perfect trusty sidekick for any Italian-inspired meal.
Creative Ways to Present
Turn your Rustic Italian Bread into more than just a loaf by slicing it thick and toasting for homemade crostini or bread bowls for creamy soups. You can also make paninis layered with fresh mozzarella, tomatoes, and basil, or serve alongside a cheese board with cured meats and olives for a Mediterranean vibe.
Make Ahead and Storage
Storing Leftovers
Store any leftover Rustic Italian Bread in a paper bag or a bread box at room temperature. This keeps the crust crisp without making the interior go stale too quickly. Bread is best consumed within two days for the freshest taste.
Freezing
This Rustic Italian Bread Recipe freezes beautifully. Slice the loaf first, then wrap the slices tightly in plastic wrap or foil and place them in a freezer-safe bag. This means you can grab just what you need for quick toasting or sandwiches later without thawing the whole loaf.
Reheating
To bring back that fresh-baked feeling, reheat slices in a toaster or under the broiler for a few minutes until the crust crisps back up. You can also warm a whole loaf by wrapping it in foil and heating it in the oven at 350°F for 10 to 15 minutes. Avoid microwaving as it tends to make the bread chewy and oddly soft.
FAQs
Can I use whole wheat flour in this Rustic Italian Bread Recipe?
Absolutely! You can substitute up to one cup of the all-purpose flour with whole wheat flour for a nuttier flavor and slightly denser texture. Just keep in mind that whole wheat flour absorbs more liquid, so you might need to adjust the water slightly.
How do I know when the bread is fully baked?
The best way is to listen for a hollow sound when you tap the bottom of the loaf. The crust should be golden brown and firm. You can also check the internal temperature with a thermometer – it should read about 200°F.
What if my dough doesn’t rise properly?
This usually means the yeast is inactive or the environment is too cold. Make sure your water is warm, around 110°F, and your yeast is fresh. Keep the dough in a warm spot away from drafts to encourage rising.
Can I add herbs or flavorings to this bread?
Yes! Adding rosemary, thyme, garlic powder, or sun-dried tomatoes to your dough before the first rise can infuse your Rustic Italian Bread Recipe with delightful flavors that make it uniquely yours.
Is this bread vegan?
Yes, this Rustic Italian Bread Recipe is vegan as it contains no animal products. Olive oil replaces butter or milk, and yeast is a naturally vegan leavening agent.
Final Thoughts
There is something truly special about baking your own Rustic Italian Bread Recipe from scratch. It’s a rewarding process that fills the house with warmth and results in a loaf that tastes far superior to anything store-bought. Whether you enjoy it plain, dipped, or alongside your favorite meal, this bread is sure to become a treasured staple in your kitchen. I wholeheartedly encourage you to try it—you’ll love every delicious crumb.
Print
Rustic Italian Bread Recipe
- Prep Time: 20 minutes
- Cook Time: 30 minutes
- Total Time: 2 hours 30 minutes
- Yield: 1 large loaf (8–10 slices)
- Category: Bread
- Method: Baking
- Cuisine: Italian
- Diet: Vegan
Description
This Rustic Italian Bread is a classic homemade artisan loaf known for its crispy crust and soft, airy interior. Made with simple pantry ingredients, it offers a traditional taste of Italy and pairs perfectly with soups, salads, or as a base for sandwiches. The recipe features an easy dough preparation, rising periods for optimal texture, and baking techniques that create a beautifully crusty yet tender bread.
Ingredients
Dry Ingredients
- 4 cups all-purpose or bread flour
- 1 ½ teaspoons salt
- 1 tablespoon sugar
- 1 packet (2 ¼ teaspoons) active dry yeast
- Cornmeal or flour for dusting
Wet Ingredients
- 1 ½ cups warm water (110°F)
- 2 tablespoons olive oil (plus more for greasing)
Instructions
- Activate Yeast: In a large bowl, combine the warm water, sugar, and yeast. Stir gently and let sit for 5–10 minutes until the mixture becomes foamy, indicating the yeast is active.
- Mix Dough: After the yeast is activated, add the olive oil. Gradually stir in the flour and salt to the yeast mixture until a shaggy dough forms.
- Knead Dough: Turn the dough out onto a floured surface and knead for 8–10 minutes until it becomes smooth and elastic. Add more flour as needed to prevent sticking.
- First Rise: Place the dough in a lightly oiled bowl and cover with a damp towel or plastic wrap. Let it rise in a warm place for 1 to 1.5 hours, or until it doubles in size.
- Shape the Loaf: Punch down the risen dough to release air. Shape it into a rustic round or oval loaf and place it on a baking sheet dusted with cornmeal or lined with parchment paper. Cover loosely and let rise again for 30–45 minutes.
- Preheat Oven & Prepare Dough: Preheat the oven to 425°F. Just before baking, slash the top of the dough with a sharp knife to allow steam to escape during baking. For a crispier crust, optionally spray the oven with water or place a pan of hot water inside the oven to create steam.
- Bake Bread: Bake the bread for 25–30 minutes or until it is golden brown and sounds hollow when tapped on the bottom.
- Cool and Serve: Remove the bread from the oven and place it on a wire rack to cool completely before slicing.
Notes
- For added flavor and texture, mix in herbs like rosemary or thyme into the dough.
- Substitute 1 cup of the white flour with whole wheat flour for a nuttier taste and denser texture.
- This bread freezes well—slice and wrap slices tightly before freezing for easy toasting later.


